Get the right number of recessed lights, spaced correctly.
Enter your room’s width, length and ceiling height, choose the room’s purpose and a spacing style, and this recessed lighting calculator gives you the recommended spacing, total lumens needed, and the exact number of recessed lights to install — instantly. No more dim corners, no more a fixture every few inches for no reason.
A common rule of thumb is to space recessed lights about half the ceiling height apart, keep the first row roughly half that distance from the wall, and aim for 15 to 20 lumens per square foot in general living spaces, more in kitchens.
Standard spacing and lumens by room type.
These figures assume a standard 8-foot ceiling and standard spacing. Use the calculator above for a layout matched to your exact room and ceiling height.
| Room Type | Ceiling Height | Recommended Spacing | Lumens / ft² | Notes |
|---|---|---|---|---|
| Living room | 8 ft | 4–5 ft | 15–20 lm | Layer with lamps for ambiance |
| Kitchen | 8 ft | 3–4 ft | 35–40 lm | Add task lights over counters |
| Bedroom | 8 ft | 4–5 ft | 10–15 lm | Pair with dimmers |
| Home office | 8 ft | 4 ft | 25–30 lm | Avoid glare on the screen |
| Tall or vaulted ceiling | 10–12 ft | 5–6.5 ft | Varies by room | Light spreads over a wider area |
| Kitchen island (task) | 8 ft | 2–3 ft off center | 40+ lm | Plan separate from the ambient grid |
Four common rooms — and the lighting rule each one follows.
What a room is mainly used for changes both the lumen target and the spacing that applies. Here is what each room is built for and the logic behind it.
Living Room
Built around layered, ambient light that works alongside lamps and fixtures, with a moderate lumen target that avoids a harsh, over-lit feel.
15–20 lm/ft²Kitchen
A task-first room that needs tighter spacing and a much higher lumen target than living spaces, especially over counters, sinks and islands.
35–40 lm/ft²Bedroom
The lowest lumen target of the four, since a bedroom’s main lighting job is soft, even ambiance rather than close-up task visibility.
10–15 lm/ft²Home Office
Needs enough lumens for reading and screen work without creating glare directly overhead a monitor, so placement matters as much as count.
25–30 lm/ft²See how recessed lighting layout changes by ceiling and spacing.
These steps cover the essentials: measuring the room and ceiling, applying the right spacing rule, and checking the lumens total before finalizing a layout.
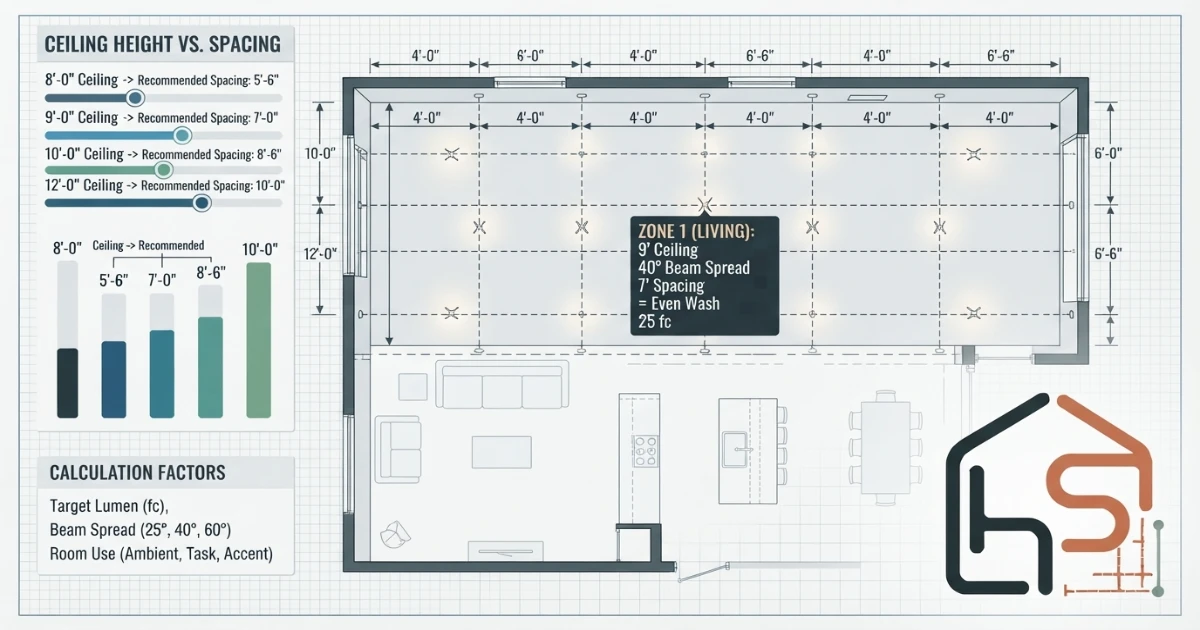
Measure the room and ceiling
Start with room width, length and ceiling height before planning fixture spacing.
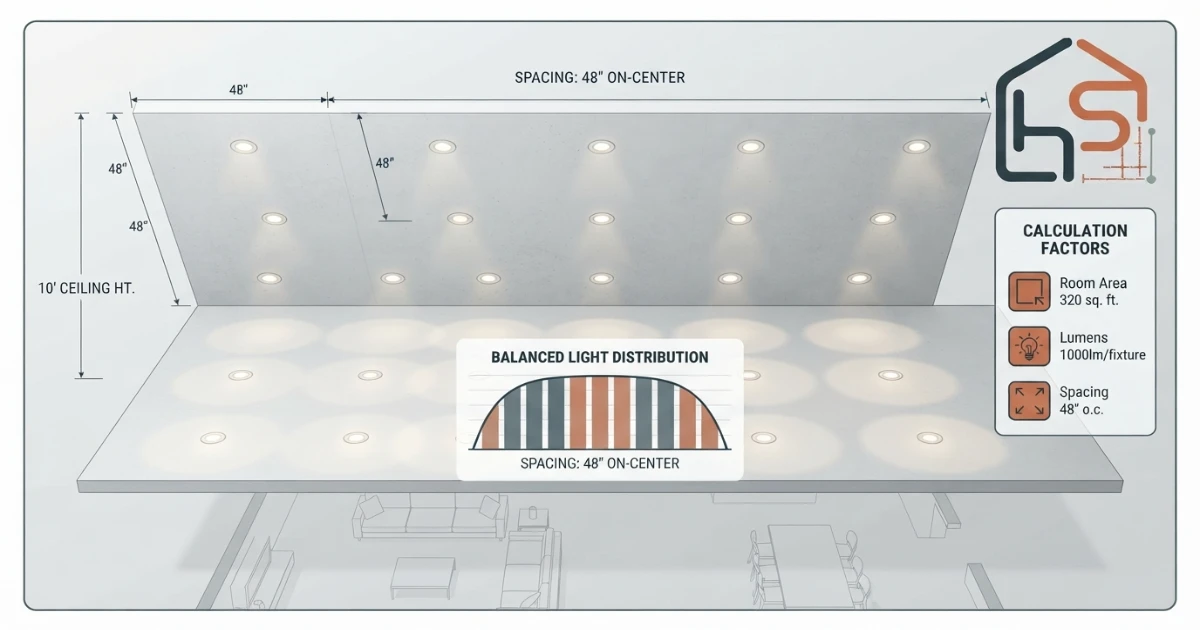
Lay out an even grid
Standard spacing produces a balanced, ambient grid, while tighter spacing adds more layered light.
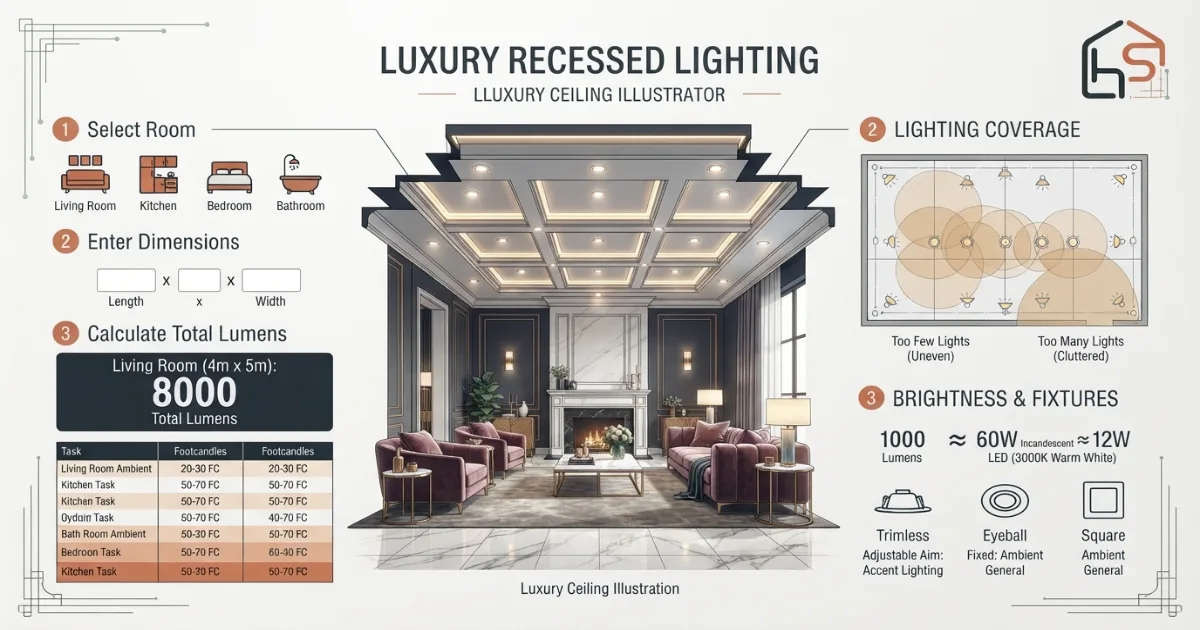
Check the lumens total
Confirm the grid count against a lumens-based check so the room isn’t under or over-lit.
How to calculate recessed lighting — the complete guide.
The most common recessed lighting mistake is spacing fixtures by eye, without a spacing rule or a lumens check. This often produces a grid that looks even on paper but leaves the corners of a room noticeably dimmer than the center, or a kitchen that looks bright in a photo but feels dim over the actual countertop. Working from both a spacing rule and a lumens target, rather than either one alone, is what produces a layout that reads as evenly lit in person.
Step 1: Measure the room and the ceiling height
Start by measuring the room’s width and length, then measure the ceiling height from floor to ceiling at a few points around the room, since older homes sometimes have a slight variance. Ceiling height plays a direct role in spacing, so this measurement matters just as much as the floor plan dimensions when planning a recessed lighting layout.
Step 2: Identify the room’s primary lighting purpose
Every recessed lighting plan should start from a clear answer to what kind of light the room mainly needs: general ambient light in a living room, close task light in a kitchen or office, or soft, low-key light in a bedroom. This decision drives the lumens target used later, so it’s worth deciding deliberately rather than defaulting to whatever spacing looks tidy on a ceiling plan.
Step 3: Understand the half-the-ceiling-height spacing rule
A widely used rule of thumb for general ambient recessed lighting is to space fixtures roughly half the ceiling height apart, so an 8-foot ceiling suggests spacing fixtures about 4 feet apart, and a 10-foot ceiling suggests closer to 5 feet. This rule produces reasonably even light coverage across the floor without requiring a full photometric lighting plan for a typical residential room.
Step 4: Adjust spacing for the room’s purpose
The half-ceiling-height rule is a starting point for general ambient lighting, but task-heavy rooms like kitchens usually need tighter spacing, closer to a third of the ceiling height, to hit the higher lumen levels those spaces require. Bedrooms and other low-key spaces can often use slightly wider spacing than the base rule suggests, since less overall brightness is the goal.
Step 5: Calculate a grid layout from the spacing figure
Once a spacing figure is set, divide the room’s width by that spacing and round up to get the number of fixtures across, then do the same for the room’s length to get the number of rows. Multiplying those two figures together gives a grid-based light count that spreads fixtures evenly across the ceiling.
Step 6: Calculate a separate lumens-based light count
Multiply the room’s square footage by the lumens-per-square-foot target for its purpose to get the total lumens needed, then divide that figure by the lumen output of a single fixture to get a second, independent light count. This lumens-based number can differ meaningfully from the grid-based number, particularly in small rooms with high ceilings or unusually bright fixture choices.
Step 7: Reconcile the two methods by using the higher number
When the grid-based and lumens-based counts disagree, using the higher of the two generally produces a safer, better-lit result, since it’s easier to dim an over-bright room with a dimmer switch than to retrofit additional fixtures into a finished ceiling later. Treat the lower number as a floor rather than a target.
Step 8: Keep the first row of lights off the wall correctly
Rather than starting the fixture grid flush against the wall, offset the first row by roughly half the spacing distance, so a 4-foot spacing plan places the first row of lights about 2 feet in from the wall. This produces more even wall-to-wall coverage than starting the grid at the wall itself, which tends to leave the room’s center comparatively darker.
Step 9: Plan wall-wash or accent lighting separately from the ambient grid
If the room includes a feature wall, artwork, or a fireplace intended for wall-wash or accent lighting, plan those fixtures as a separate layer rather than folding them into the general grid spacing calculation. Accent fixtures are typically placed closer to the wall and spaced differently than ambient ceiling lights, since their job is to graze a vertical surface rather than light the floor evenly.
Step 10: Add extra fixtures for kitchen islands and task areas
A kitchen island, a reading chair, or a desk usually needs one or two dedicated fixtures placed directly above the task area, in addition to the general ambient grid covering the rest of the room. These task fixtures are typically centered over the specific surface rather than aligned to the room’s overall spacing pattern.
Step 11: Choose a color temperature appropriate to the room
Color temperature, measured in Kelvin, is a separate decision from lumen output and spacing, but it meaningfully affects how bright a room feels even at the same lumen count. Warmer light around 2700 to 3000 Kelvin suits living rooms and bedrooms, while a cooler 3500 to 4000 Kelvin is more common in kitchens and home offices where task visibility matters more than ambiance.
Step 12: Plan for dimmers on ambient circuits
Dimmer switches let a single fixture layout serve multiple purposes throughout the day, from a fully bright kitchen during meal prep to a softer setting during a dinner party, without needing separate fixture counts for each scenario. Confirm that any LED recessed lights chosen are explicitly rated as dimmable, since not all LED fixtures are compatible with every dimmer switch.
Step 13: Check for joists, ducts and existing obstructions
Before finalizing exact fixture positions, check the ceiling cavity for joists, HVAC ducts, plumbing, and existing electrical runs that might force a fixture a few inches off its calculated grid position. A licensed electrician can typically confirm this with a stud finder or by referencing existing framing plans before any cutting begins.
Step 14: Choose a trim size and beam angle to match the room
4-inch recessed lights produce a narrower, more focused beam and are often used for accent lighting or smaller rooms, while 6-inch fixtures spread light over a wider area and are the more common default for general room lighting. A wider beam angle also affects how far apart fixtures can be spaced while still producing even coverage.
Step 15: Plan switching and zoning before installation
Deciding which fixtures share a switch, and whether task lighting and ambient lighting are wired to separate switches, should happen at the planning stage rather than after installation. Splitting a kitchen’s island task lights from its general ceiling grid, for example, gives far more control over the room’s mood than wiring everything to a single switch.
Step 16: Confirm circuit capacity with a licensed electrician
The number of recessed lights that can safely share a single circuit depends on the wattage of each fixture and the circuit’s amperage rating, which varies by home and local electrical code. This figure should always be confirmed by a licensed electrician rather than estimated from a general spacing or lumens calculation, since it involves electrical safety rather than lighting design alone.
Step 17: Recheck the full layout before cutting into the ceiling
Before any holes are cut, lay out the full fixture plan on paper or with painter’s tape marks on the ceiling, and walk the room to confirm spacing, wall offsets, and task-area coverage all look right together. This final check catches most layout mistakes while they’re still easy to fix, well before drywall has been cut and fixtures have been wired into place.
Layout rules that prevent a dim or unevenly lit room.
A calculator gives the best starting numbers, but the final layout still depends on joists, ducts, and how each area connects to the room’s actual use. The rules below cover the details worth checking even after settling on a light count.
Space recessed lights about half the ceiling height apart, offset the first row half that distance from the wall, aim for 15 to 20 lumens per square foot in living spaces (more in kitchens), and confirm circuit capacity with an electrician.
Use both spacing and lumens
An even grid alone doesn’t guarantee enough brightness; check the lumens total against the room’s actual purpose.
Offset the first row from the wall
Starting the grid flush against the wall usually leaves the room’s center comparatively darker than the perimeter.
Check the ceiling cavity first
Confirm joists, ducts, and existing wiring don’t force fixtures off their calculated positions before cutting.
Confirm circuits with an electrician
Fixture wattage and circuit capacity are a safety question, not a lighting design one — always verify with a licensed electrician.
Helpful lighting and room planning topics.
A recessed lighting plan rarely comes together from spacing alone. Once fixture count is settled, it helps to plan the surrounding elements at the same time — the pendant or chandelier over a table, the furniture layout the light needs to cover, and the color palette the light will interact with. Use these supporting pages from the HomeStyle Calculator homepage to plan the rest of the room.
Six things electricians always check before finalizing a layout.
Tape the grid before cutting
Mark every fixture position on the ceiling with tape and step back to check the layout looks even in person, not just on paper.
Split task and ambient switches
Wire kitchen island or desk task lights on a separate switch from the general ambient grid for more control over the room’s mood.
Match color temperature to purpose
Warmer light suits living rooms and bedrooms, while a cooler temperature better supports task visibility in kitchens and offices.
Confirm dimmer compatibility
Not every LED recessed fixture works with every dimmer switch, so check compatibility before wiring a dimmed circuit.
Avoid glare directly over screens
In a home office, offset fixtures from directly above a monitor to avoid reflected glare on the screen.
Leave circuit capacity to the electrician
Fixture wattage against circuit amperage is a code and safety question, always confirmed by a licensed electrician, not estimated.
Recessed lighting calculator questions — answered.
More calculators for every room decision.
Every tool uses professional designer and electrician formulas. Free, instant, no sign-up — just enter your room and get the exact answer.
Bookmark HomeStyle Calculator for every room in the house.
From a small bedroom to a bright, task-lit kitchen, our free tools give you the exact spacing, lumens and light count before you buy or install.