Find the right layout for any room.
Enter your room’s width and length, choose the room’s purpose and a layout density, and get an instant furniture zone, walkway clearance and open-floor breakdown — using the same traffic-flow rules interior designers rely on. No more layouts that block a doorway or crowd every wall with furniture.
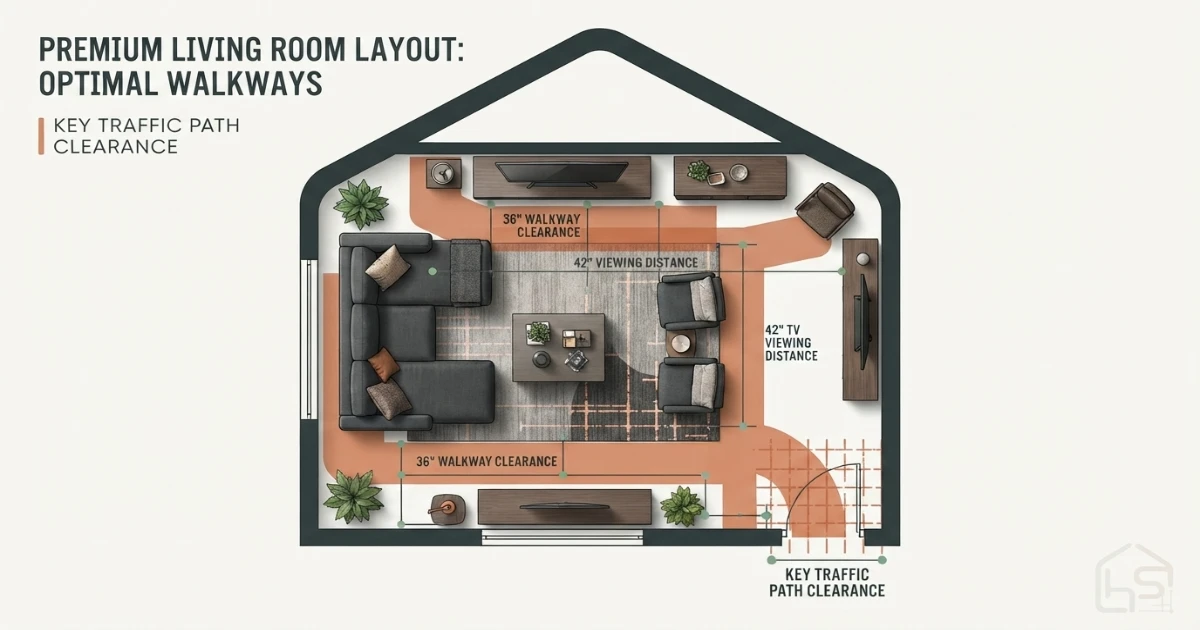
Keep at least 30 to 36 inches of clearance for a main walkway, let furniture occupy roughly 35 to 55 percent of the floor area, and leave 3 to 8 feet between seating pieces in a conversation area.
Standard layout guidelines by room type and size.
These estimates assume a balanced layout density. Use the calculator above for a layout matched to your exact room dimensions and purpose.
| Room Type | Typical Size | Furniture Footprint | Walkway Clearance | Notes |
|---|---|---|---|---|
| Living room | 14×16 ft | ~45% of floor area | 34–36 in | 3–8 ft between seating |
| Bedroom | 12×14 ft | ~45% of floor area | 30–36 in around bed | 24–36 in at foot of bed |
| Home office | 10×12 ft | ~40% of floor area | 36–42 in behind chair | See desk size calculator |
| Dining room | 12×14 ft | ~40% of floor area | 36–42 in from table | Add 24 in for chair pull-out |
| Small room (any type) | 8×10 ft | ≤40% of floor area | 30 in minimum | Prioritize one clear path |
| Open-plan great room | 18×24 ft | Varies by zone | 36 in between zones | Rugs anchor each zone |
Four common room types — and the rule each one follows.
What a room is mainly used for changes the clearance and footprint rule that applies to it. Here is what each purpose is built for and the layout logic behind it.
Living Room
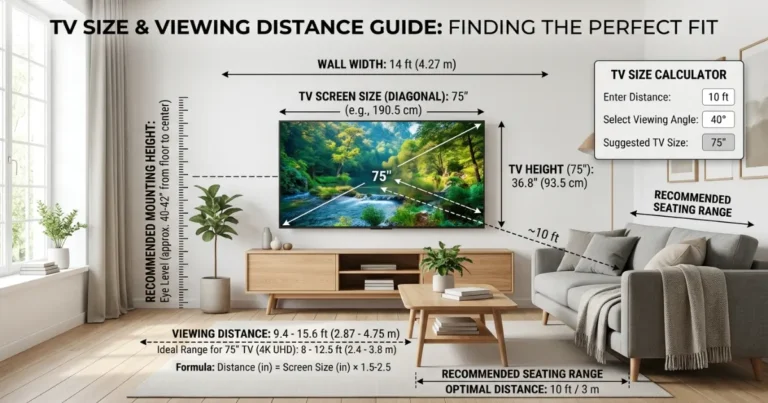
Built around a conversation area, with seating spaced close enough for easy talking and a clear path connecting entries, the TV, and any secondary seating.
Seating gap: 3–8 ftBedroom
Organized around the bed’s clearance for making it and walking around it, with a secondary path preserved to the closet and door regardless of bed size.
Clearance: 24–36 in per sideHome Office
Anchored by the desk and chair, with clearance behind the chair prioritized over maximizing surrounding storage or seating.
Clearance: 36–42 in behind chairDining Room
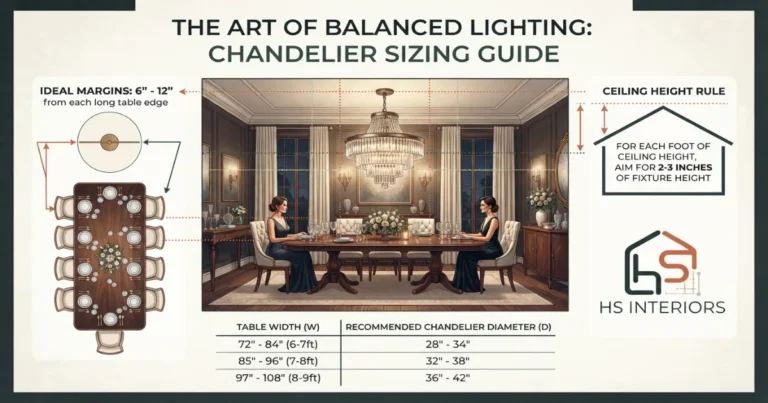
Centered on the table, with enough room around it for chairs to be pulled out fully and for guests to walk around a seated table without squeezing by.
Clearance: 36–42 in from tableSee how room layout changes by purpose and density.
These steps cover the essentials: measuring the room, applying the right footprint and clearance formula, and confirming traffic flow before you rearrange or buy furniture.
Measure the room
Start with room width and length before planning furniture placement. Note doors, windows and any fixed features.
Apply the right footprint
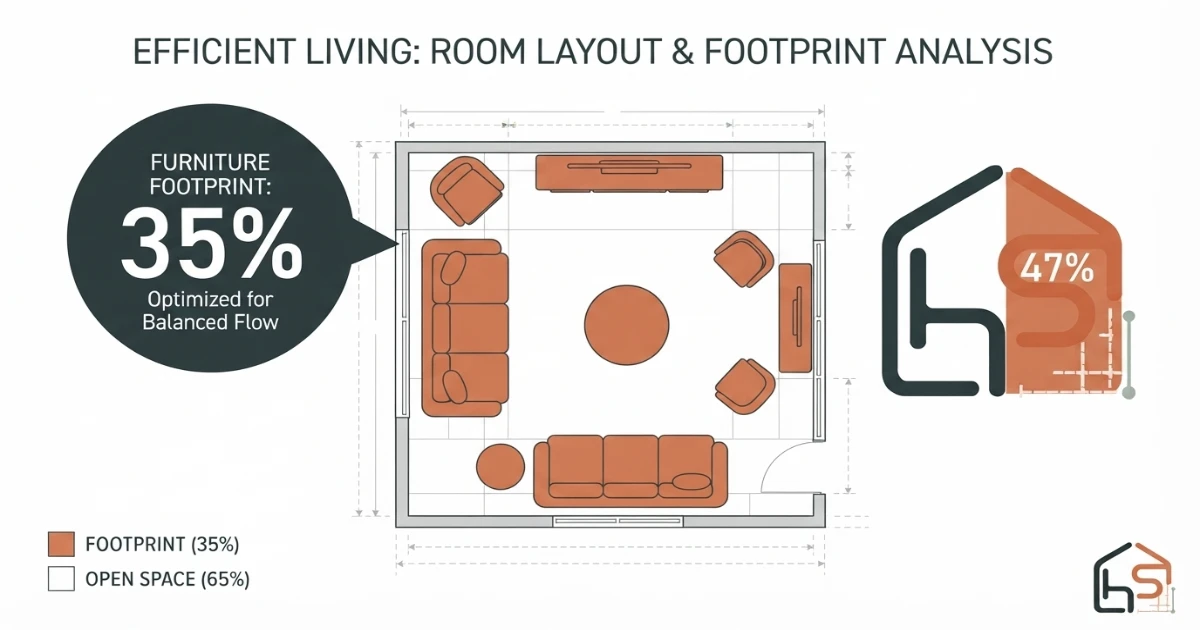
Open layouts use less of the floor for furniture, while cozy layouts intentionally fill more of the room.
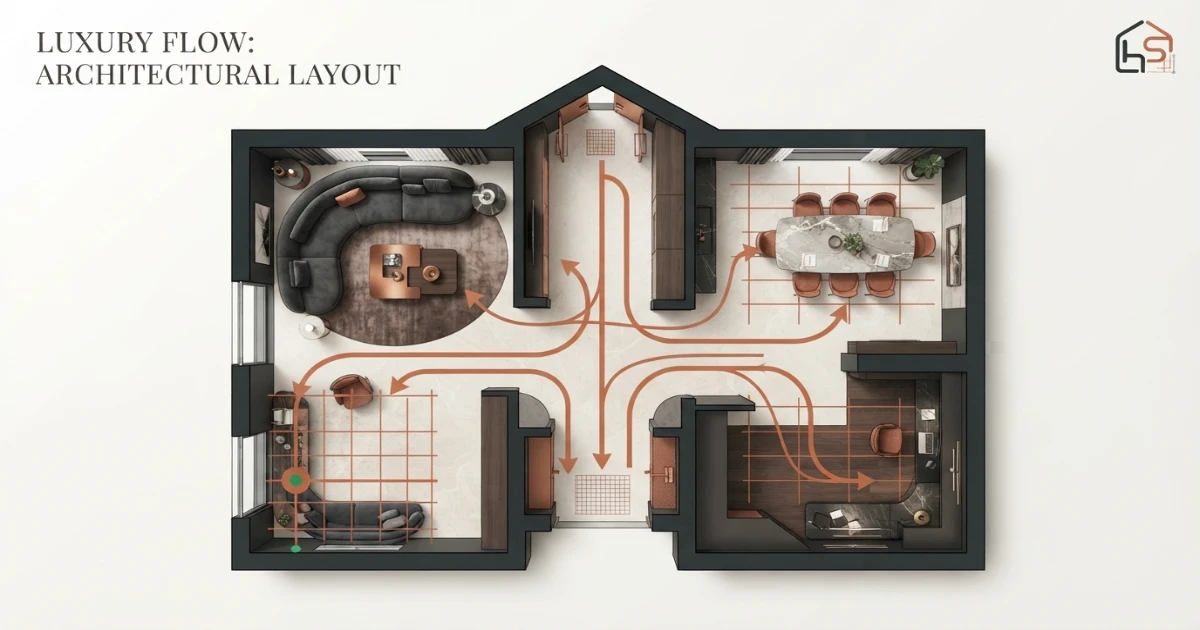
Confirm traffic flow
Keeping a consistent main walkway through the room keeps the layout functional day to day, not just visually balanced.
How to plan a room layout — the complete guide.
The most common room layout mistake is pushing every piece of furniture against the walls to maximize open floor in the middle. While this feels intuitive, it often leaves the center of the room feeling empty and disconnected, and it forces conversation across an unnaturally wide gap. Planning around traffic flow and functional zones, rather than simply perimeter placement, produces a layout that feels both open and purposeful.
Step 1: Measure the room and note fixed features
Start by measuring the room’s width and length, then sketch the location of every door, window, closet, radiator, and permanent fixture such as a fireplace. These fixed features constrain where furniture can realistically go far more than the room’s raw dimensions do. A door that swings inward, for instance, needs its full arc kept clear of furniture, and a window seat under a low sill limits what can be placed directly beneath it.
Step 2: Identify the room’s primary function before placing anything
Every room layout should start from a clear answer to what the room’s main activity is: conversation and media in a living room, sleep and dressing in a bedroom, focused work in a home office, or shared meals in a dining room. Furniture and clearance decisions cascade from this primary function, so resist the urge to place the largest or most striking piece of furniture first; place the piece central to the room’s main activity first instead, such as the sofa facing the TV or the bed against the best wall.
Step 3: Establish the main walkway before anything else
Before arranging furniture, mentally trace the most natural path a person takes when entering the room and moving to its far side or to a connecting doorway. This main walkway needs at least 30 to 36 inches of clear width, and furniture should be arranged around it rather than placed first and adjusted around afterward. Secondary paths, such as a route to a closet or a side table, can be narrower, around 24 inches, since they carry less frequent traffic.
Step 4: Decide how much of the floor furniture should occupy
As a general guideline, furniture occupies roughly 35 to 55 percent of a room’s floor area. A more open, minimal layout sits near the lower end of that range, leaving generous negative space that reads as calm and uncluttered. A cozier, fuller layout sits near the upper end, which can make a room feel warmer and more intimate but requires more careful planning of walkways to avoid feeling cramped. Neither end is inherently better; the right density depends on the room’s size, the household’s habits, and the desired mood.
Step 5: Space living room seating for actual conversation
In a living room, arrange the primary seating pieces 3 to 8 feet apart, measured from the front edge of one seat to the front edge of the opposite seat. This range keeps conversation comfortable without raising voices, while still leaving room for a coffee table and some legroom in between. Seating placed much closer feels cramped, while seating spaced much farther apart can make a room feel disconnected, forcing people to speak across an unnatural distance.
Step 6: Establish a focal point and orient furniture toward it
Most well-planned rooms organize furniture around a focal point, such as a fireplace, a media wall, or a large window with a view. Orienting the primary seating or bed toward this focal point, rather than toward a blank wall or an awkward corner, gives the layout a clear sense of purpose. In rooms without an obvious architectural focal point, furniture itself, such as a striking piece of art or a bold rug, can serve the same organizing role.
Step 7: Float furniture off the walls when the room allows it
Pushing every piece of furniture flush against the walls is a common instinct, especially in smaller rooms, but it isn’t always the best choice. In rooms with adequate floor area, floating a sofa or bed a few inches to a few feet off the wall, and adding a console table or bench behind it, often creates a more intentional, layered look than a rigid perimeter arrangement. This technique works best once the room’s floor area comfortably exceeds the minimum needed for its core furniture.
Step 8: Plan bedroom clearance around the bed, not just the room
In a bedroom, prioritize clearance on the sides of the bed used for getting in, out, and for making the bed daily, generally 24 to 36 inches per side. At the foot of the bed, preserve at least 24 to 36 inches as well, particularly if that path connects to a closet or the room’s main door. Nightstands should sit close enough to the mattress to be reachable from a lying position, typically within a couple of inches of the bed frame, without eating into the side clearance meant for walking.
Step 9: Size a dining room layout around chair pull-out, not just the table
A dining room’s clearance needs to account for a seated chair being pulled out and for someone to stand and walk behind a seated guest at the same time. Budget roughly 24 inches for a pulled-out chair plus an additional 12 to 24 inches for a walking path behind it, which typically means keeping the table at least 36 to 42 inches from the nearest wall or the next piece of furniture on every side that requires access.
Step 10: Anchor a home office layout around the chair’s full range of motion
A home office layout should preserve enough space behind the desk chair for it to roll back fully and for a person to stand and turn around without hitting a bookshelf or wall, generally 36 to 42 inches, matching the same clearance principles used for desk sizing specifically. Secondary storage, such as filing cabinets or bookshelves, works best placed to the side or behind the desk’s clearance zone rather than within it.
Step 11: Use rugs to visually anchor a furniture zone
In open-plan spaces or rooms with multiple furniture groupings, a rug sized to the seating area helps visually define that zone as a cohesive unit rather than a scattering of individual pieces. As a general rule, at least the front legs of every major seating piece should rest on the rug, and in more generous layouts, all four legs of every piece sit on it. See a dedicated rug size guide for the exact dimensions relative to a specific seating arrangement.
Step 12: Divide open-plan rooms into distinct functional zones
An open-plan living, dining and kitchen space benefits from being treated as several distinct rooms sharing one floor, rather than one undifferentiated area. Use furniture groupings, rugs, and sometimes a change in ceiling or lighting fixture to visually separate the living zone from the dining zone from any home office nook, while still preserving one continuous main walkway that threads through all of them without forcing anyone to cut across a seating or dining area.
Step 13: Adapt the layout for a small or awkwardly shaped room
In a small room, prioritize a single, uninterrupted walkway over generous furniture footprint, and aim for a layout density closer to 35 to 40 percent rather than 55 percent. Multi-functional furniture, such as a storage ottoman doubling as a coffee table or a daybed doubling as both seating and a guest bed, reduces the total number of pieces needed without sacrificing function. In an awkwardly angled or irregularly shaped room, treat the largest usable rectangle within the space as the primary layout zone, and use the leftover angled or narrow sections for lower-priority storage or decorative pieces.
Step 14: Balance symmetry and asymmetry intentionally
A symmetrical layout, such as matching nightstands and lamps on either side of a centered bed, reads as calm and formal, and tends to suit traditional or transitional styles well. An asymmetrical layout, such as a single oversized armchair balanced by a pair of smaller accent chairs on the opposite side of a room, can feel more relaxed and contemporary. Neither approach is universally correct; choosing one intentionally, rather than ending up asymmetrical purely by accident of available floor space, is what makes a layout read as considered.
Step 15: Coordinate layout with lighting placement
A furniture layout and a lighting plan should be designed together rather than sequentially, since a floor lamp needs to sit within reach of a reading chair, and a pendant or chandelier needs to center over a table or seating group rather than the room’s raw geometric center. Walk through the planned furniture layout and confirm that every seating or work area has a light source within a reasonable distance before finalizing outlet or fixture locations.
Step 16: Recheck the layout with tape or cardboard before moving furniture
Before committing to a furniture rearrangement or a new purchase, mark the footprint of each major piece on the floor with painter’s tape, or cut cardboard to scale and place it in position. This makes walkway width, seating distance, and door clearance immediately obvious in a way that a floor plan sketch alone often doesn’t capture, and it’s far easier to correct a taped-out mistake than to discover the same problem after furniture has already been delivered and arranged.
Layout rules that prevent a cramped or disconnected room.
A calculator gives the best starting numbers, but the final layout still depends on door swings, window placement, and how each zone connects to the rest of the home. The rules below cover the details worth checking even after settling on a footprint.
For most rooms, keep at least 30 to 36 inches of clearance for the main walkway, let furniture occupy roughly 35 to 55 percent of the floor area depending on desired coziness, and orient the primary furniture toward the room’s natural focal point.
Plan the walkway first
Establish the main traffic path through the room before placing furniture, rather than fitting a path in around furniture afterward.
Don’t default to wall-hugging
Floating furniture off the wall, when the room allows it, often creates a more intentional and connected layout than a rigid perimeter.
Check every door and window swing
Confirm doors, windows, and cabinet fronts all open fully without hitting furniture placed in the new layout.
Tape it out before moving anything
Mark furniture footprints on the floor with painter’s tape to catch clearance mistakes before furniture is actually moved or delivered.
Helpful room planning topics.
A layout rarely comes together from floor space alone. Once you know your furniture zone, it helps to plan the surrounding elements at the same time — rug size beneath the seating, lighting above each zone, and window treatments around the perimeter. Use these supporting pages from the HomeStyle Calculator homepage to plan the rest of the room.
Six things designers always check before finalizing a layout.
Tape the walkway before moving furniture
Mark the main path through the room with painter’s tape and walk it at normal pace to confirm the width actually feels comfortable.
Orient seating toward the focal point
Whether it’s a fireplace, TV, or window view, the primary seating should face it directly rather than at an awkward angle.
Don’t ignore secondary paths
A path to a closet or side door needs at least 24 inches of clearance, even if it sees less traffic than the main walkway.
Float furniture when the room allows it
A sofa or bed pulled a few inches or feet off the wall often reads as more intentional than one pushed flush against it.
Plan lighting alongside furniture, not after
A reading chair needs a lamp within reach, and a pendant needs to center over the furniture group below it, not the room’s raw center.
Zone open-plan spaces with rugs
A distinct rug under each furniture grouping helps an open-plan room read as several intentional zones rather than one undefined space.
Room layout questions — answered.
More calculators for every room decision.
Every tool uses professional designer formulas. Free, instant, no sign-up — just enter your room and get the exact answer.
Bookmark HomeStyle Calculator for every room in the house.
From a cozy living room to an open-plan great room, our free tools give you the exact layout, clearance and furniture zone before you rearrange or buy.