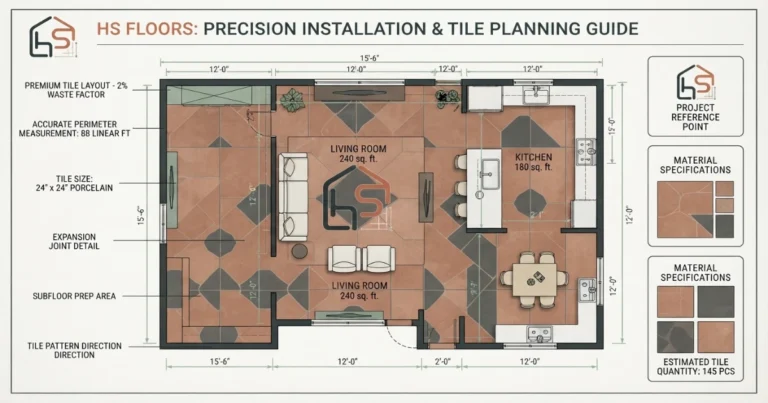
Find the exact tile count, boxes and waste allowance for any room.
Enter your room dimensions, choose a tile size and layout pattern, and get an instant material estimate — using the same waste allowance rules professional installers rely on. No guesswork, no square footage math, and no third trip back to the store for one more box.
Standard tile quantities by room size.
These estimates assume a 12 by 12 inch tile, straight layout, simple room shape and a 1/8 inch grout line. Use the calculator above for your exact room. Rooms with more corners, niches or thresholds will need a larger waste allowance than these defaults, so treat the table as a starting reference rather than a final order.
| Room Size | Room Area | Total w/ Waste | Tiles Needed | Boxes |
|---|---|---|---|---|
| 6 × 8 ft (bathroom) | 48 sq ft | 53 sq ft | 53 tiles | 5 boxes |
| 8 × 10 ft (kitchen) | 80 sq ft | 88 sq ft | 88 tiles | 9 boxes |
| 10 × 12 ft (living area) | 120 sq ft | 132 sq ft | 132 tiles | 14 boxes |
| 12 × 15 ft (open plan) | 180 sq ft | 198 sq ft | 198 tiles | 20 boxes |
| 15 × 20 ft (basement) | 300 sq ft | 330 sq ft | 330 tiles | 33 boxes |
| 20 × 25 ft (whole floor) | 500 sq ft | 550 sq ft | 550 tiles | 55 boxes |
Four layout patterns — and how much extra each one needs.
Pattern affects both look and waste. Here is what each layout looks like, how much extra material it needs, and which rooms it suits best.
Straight / Grid
Tiles line up in simple rows and columns, parallel to the walls. The most efficient pattern with the least waste, and the easiest for most installers to lay quickly and evenly.
Waste: ~10%Diagonal
Tiles are set at a 45-degree angle to the walls, which can make a small room feel wider. It needs more cut tiles along the edges, so plan for extra waste and a longer install time.
Waste: ~15%Herringbone
A zig-zag pattern using rectangular tiles set at right angles to each other. A striking, high-end look for entryways and feature floors, but the most demanding pattern for waste and labor.
Waste: ~20%Brick Offset
Each row is offset by half a tile from the one below it, like a running bond. A classic, versatile pattern for plank-style tile that hides minor size variation between pieces.
Waste: ~12%See how tile quantity changes by room.
These steps cover the essentials: measuring the room, choosing a tile size, and accounting for waste before you order boxes.
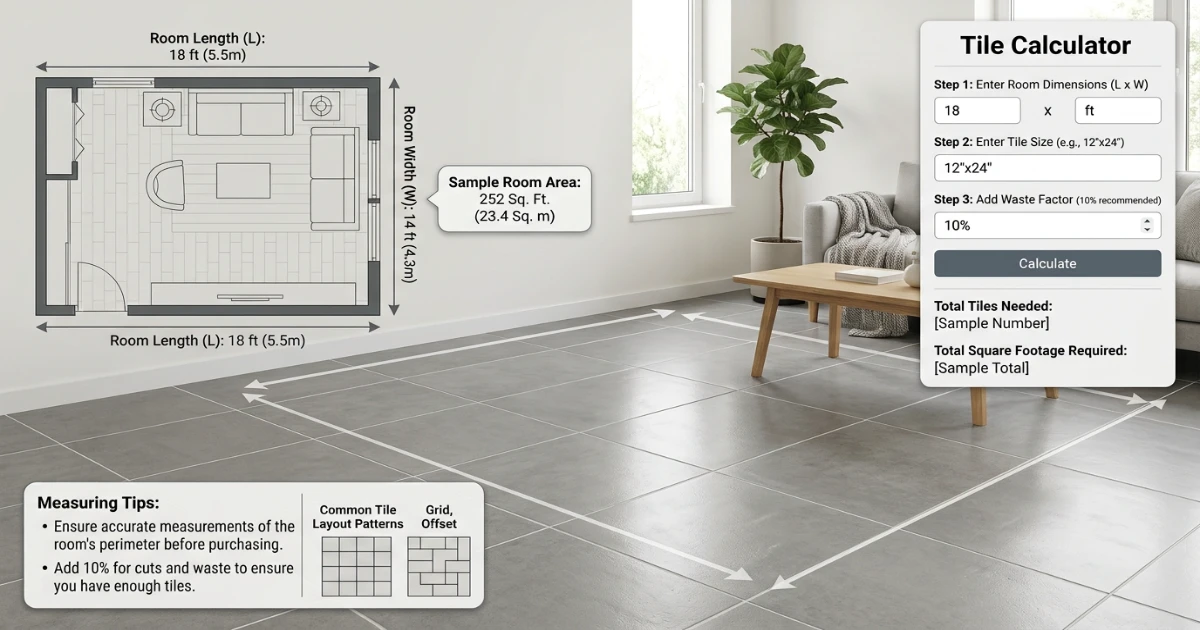
Measure the room
Start with room length and width before choosing a tile size. Write both numbers down along with any alcoves or closets, since all three feed into the total area calculation later.
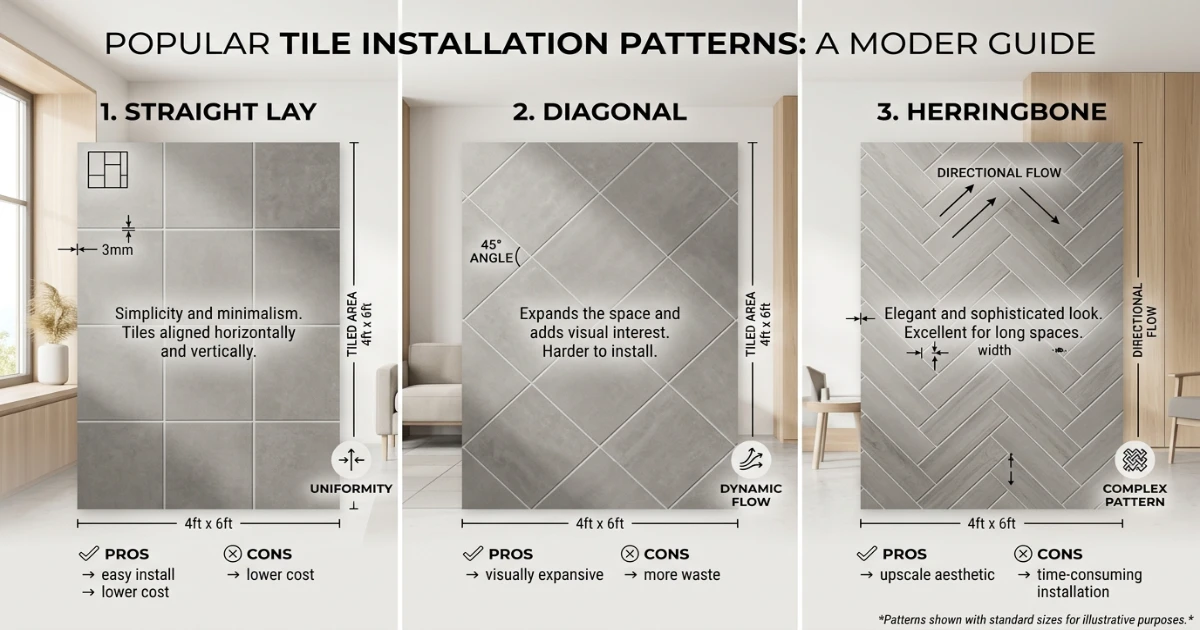
Choose a layout pattern
Angled patterns like diagonal and herringbone use more material at the edges. This is usually the single factor that changes a waste estimate the most, more than tile size itself.
Set the grout line
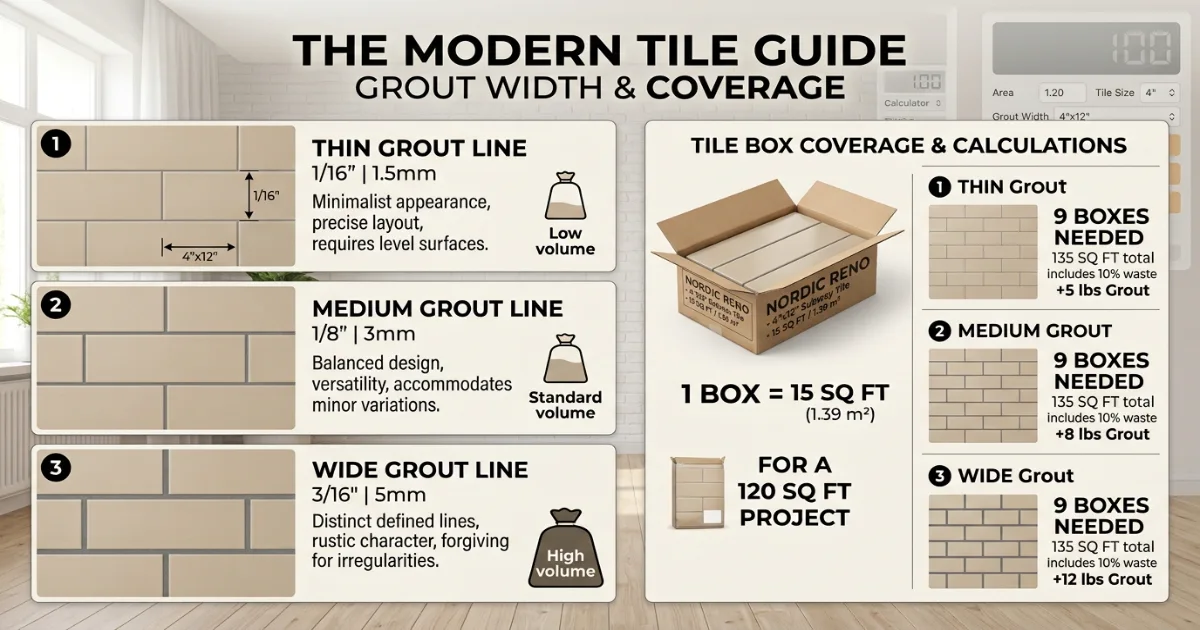
Wider grout lines use slightly less tile per square foot but need more grout. Thinner rectified joints look sleeker but demand straighter, more uniform tile edges.
How to calculate tile — the complete guide.
The most common tiling mistake is buying too little extra material. Dye lots vary between production batches, so running short partway through a job can mean a subtly different shade of tile finishing the room. When in doubt, round up to the next full box, and buy one extra box beyond your calculated total for future repairs and cuts that go wrong.
Step 1: Measure the room
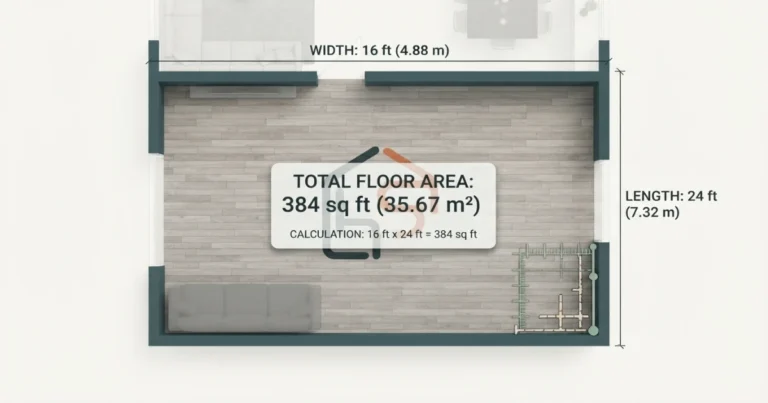
Measure the length and width of the area to be tiled, then multiply them to get the square footage. For irregular rooms, split the space into simple rectangles, calculate each one separately, and add the totals together. Measure at floor level rather than at the baseboard, since older rooms are rarely perfectly square, and always round each measurement up to the nearest half foot rather than down.
Step 2: Choose a tile size
Smaller tiles, such as 8 by 8 inch mosaics, use more grout lines and suit bathrooms, backsplashes or areas that need slip resistance. Standard 12 by 12 inch tile is the most common, all-purpose choice. Large-format tiles, 18 by 18 inches and up, use fewer grout lines and read as more seamless and modern, though they require a flatter subfloor and more careful handling during installation to avoid cracking.
Step 3: Choose a layout pattern
Pattern choice changes both the finished look and the waste allowance. A straight, grid-aligned layout is the most efficient and needs roughly 10 percent extra material. Diagonal layouts need about 15 percent extra due to angled cuts along the walls. Herringbone and other complex patterns can need 15 to 20 percent extra, since every row end requires an angled cut. When mixing tile sizes within a single pattern, calculate waste separately for each size rather than averaging them together.
Step 4: Set the grout line width
Grout line width is partly aesthetic and partly determined by the tile itself. Rectified tile, cut to a very precise, consistent edge, can use a tight 1/16 to 1/8 inch joint for a nearly seamless look. Standard tile typically uses a 3/16 inch joint. Natural stone and handmade tile, which vary more in size from piece to piece, usually need a 1/4 inch or wider joint to accommodate that variation without the pattern looking crooked.
Step 5: Calculate the waste allowance
Waste allowance covers cut tiles at the edges, breakage during handling, and future repairs. Add the pattern’s base waste percentage to your room’s total area, and add a few percentage points more if the room has many corners, a complex shape, or fixtures like a floor drain or hearth to cut around. Rooms shaped like a simple rectangle need the least extra; L-shaped or multi-alcove rooms should add 5 percent or more on top of the pattern allowance.
Step 6: Convert to boxes
Divide your total square footage, including waste, by the coverage per box listed on the tile’s packaging, commonly 10 to 15 square feet per box. Always round up to the next full box rather than down, since a partial box still has to be opened and paid for in most cases. Buying tile from the same production run, known as the same dye lot, for the entire job also prevents subtle color shifts between boxes purchased at different times.
Step 7: Plan for subfloor and underlayment
Tile needs a flat, stable subfloor to avoid cracking over time. Wood subfloors typically need cement backer board installed first, while concrete slabs may only need a crack-isolation membrane depending on their condition. Factor the added height of backer board or underlayment into any thresholds or transitions to adjoining rooms, since even a half-inch difference can create a trip hazard at doorways.
Step 8: Avoid the most common ordering mistakes
Beyond underestimating waste, a few other mistakes come up repeatedly. Ordering tile from different dye lots is one of the most frequent, since even the same product number can shift slightly in color between production runs. Forgetting to account for a complex room shape is another, since a calculator based on total square footage alone can underestimate the cuts needed around islands, niches or curved walls. Finally, skipping the extra box for future repairs means a cracked tile years later may not be replaceable with a matching piece.
Tile material types: ceramic, porcelain and natural stone
- Ceramic — the most affordable and widely available option, suited to walls and light-to-moderate traffic floors. Easier to cut than porcelain, which can make DIY installation more approachable.
- Porcelain — denser and more water-resistant than ceramic, standing up well to heavy traffic and both indoor and some outdoor uses. Harder to cut, so plan for a wet saw rather than a manual tile cutter.
- Natural stone — marble, travertine, slate and similar materials offer unique veining and texture, but need sealing and more careful maintenance than ceramic or porcelain. Expect wider grout lines and more size variation between pieces.
- Large-format porcelain slabs — oversized panels used for feature walls or seamless floors, offering very few grout lines. Installation typically requires specialized equipment and an experienced installer.
Tile buying rules that prevent a second trip to the store.
A calculator gives the best starting numbers, but the final purchase still depends on room shape, subfloor condition, and how the tile will actually be cut and laid. The rules below cover the details that a single length-and-width measurement can’t capture on its own, and they’re worth reviewing even after you’ve settled on a quantity from the calculator above.
For most rooms, measure length by width for total square footage, add 10 percent waste for a straight layout or 15 to 20 percent for diagonal or herringbone, then round up to the next full box. Buy one extra box beyond that for future repairs. If you’re unsure between two quantities, the larger order almost always costs less in the long run than a second trip for a mismatched dye lot.
Never buy exact square footage
Ordering the bare minimum leaves nothing for cut tiles, breakage or mistakes. Always add the pattern-appropriate waste percentage before rounding up to boxes, even for a simple, rectangular room.
Match dye lot across boxes
Tile color can shift subtly between production runs even under the same product name. Buy all boxes for a single job from the same dye lot, and check the lot number printed on each box before opening it.
Check subfloor requirements first
Tile needs a flat, stable base. Confirm whether your subfloor needs backer board, a leveling compound, or a crack-isolation membrane before ordering tile, since this can change the final floor height and door clearances.
Keep leftover boxes sealed
Store any unopened extra boxes in a dry area rather than returning them immediately. A sealed box of matching tile is the easiest way to repair a cracked piece years later without re-tiling the whole room.
Finally, always order a sample tile or a small box before committing to a large room. Color and finish can look different under a showroom’s lighting than they will next to your own cabinetry, walls and daylight direction, and a sample is a far cheaper way to catch a mismatch than a full return of a room’s worth of tile.
Helpful room planning topics.
A tile floor rarely stands alone in a room’s design. Once you know your quantity and layout, it helps to plan the surrounding elements at the same time — rug placement over the new floor, wall colour against the tile tone, and furniture proportions relative to the finished surface. Getting these elements to agree with each other is usually what separates a room that feels intentionally designed from one that feels like it was renovated piece by piece over time. Use these supporting pages from the HomeStyle Calculator homepage to plan the rest of the room.
Six things professional installers always check before ordering tile.
Dry-lay before cutting anything
Laying out a few rows of tile without adhesive first reveals how cuts will fall at the walls and helps center the pattern for the most balanced look, especially in rooms with an obvious focal point like an island or fireplace.
Buy more waste than feels necessary
Running short mid-job is the most common installer complaint. Err toward the higher end of the waste range even if the budget calculation suggests less, since a mismatched dye lot on a follow-up order is a worse outcome than a spare box.
Check the subfloor flatness
Large-format tile in particular needs a very flat subfloor to avoid lippage, where tile edges sit at slightly different heights. A self-leveling compound is a common fix before laying tile over an uneven floor.
Match grout color to the look you want
A grout color close to the tile itself minimizes the visual grid and makes the floor read as one continuous surface. A contrasting grout color emphasizes the pattern and individual tiles instead.
Seal natural stone before grouting
Porous stone tile can absorb grout haze permanently if it isn’t sealed first. This extra step adds time but prevents a stained, cloudy finish that’s difficult to correct after the fact.
Order a sample before committing
Tile color and finish shift dramatically under different lighting. Order a sample tile and view it in the room at both day and night before ordering a full quantity, ideally placed on the actual floor for a few days.
Tile calculation questions — answered.
12 calculators for every room decision.
Every tool uses professional designer formulas. Free, instant, no sign-up — just enter your room and get the exact answer.
Bookmark HomeStyle Calculator for every room in the house.
From a small bathroom to a whole-floor renovation, our free tools give you the exact tile count, boxes and waste allowance before you order material.