Find out Exactly How Many Lumens Your Room Needs.
Enter your room size, room type and desired brightness, and get an instant total lumens target and bulb count — using the same foot-candle standards lighting designers rely on. No more rooms that are too dim to work in or too bright to relax in.
Multiply your room’s square footage by 10 to 20 lumens per square foot for ambient living spaces, or 30 to 50 lumens per square foot for task-heavy rooms like kitchens and home offices.
Recommended lumens per square foot by room type.
These figures assume a standard brightness level and an 8 foot ceiling. Use the calculator above for a target matched to your exact room size and desired mood.
| Room Type | Lumens / Sq Ft | Foot-Candles | 150 Sq Ft Room | Notes |
|---|---|---|---|---|
| Living room | 10–20 lm | 10–20 fc | 1,500–3,000 lm | Layer ambient + accent lighting |
| Bedroom | 10–20 lm | 10–20 fc | 1,500–3,000 lm | Add task lighting at bedside |
| Kitchen | 30–40 lm | 30–40 fc | 4,500–6,000 lm | Add 40–80 lm/sq ft over counters |
| Bathroom | 20–40 lm | 20–40 fc | 3,000–6,000 lm | Higher near mirror / vanity |
| Home office | 30–50 lm | 30–50 fc | 4,500–7,500 lm | Task lighting reduces eye strain |
| Dining room | 30–40 lm | 30–40 fc | 4,500–6,000 lm | Concentrate over the table |
Six room types — and the lighting target each one follows.
What a room is mainly used for changes how many lumens per square foot it needs. Here is the logic behind each room type’s target.
Kitchen
Task-heavy work involving knives and hot surfaces demands strong, even light, with extra concentrated lighting over countertops and prep zones.
30–40 lm/sq ft generalHome Office
Reading and screen work over long hours benefits from bright, even light that reduces eye strain, layered with a focused desk lamp.
30–50 lm/sq ftBathroom
Grooming tasks like shaving and applying makeup need bright, shadow-free light concentrated around the mirror and vanity area.
20–40 lm/sq ftDining Room
Light concentrates over the table itself rather than spreading evenly, typically through a pendant or chandelier centered above it.
30–40 lm/sq ftLiving Room
A flexible mix of relaxing and socializing calls for layered lighting — ambient overhead, task lamps by seating, and accent lighting for art or shelving.
10–20 lm/sq ftBedroom
Lower overall brightness supports winding down, with bedside task lamps providing brighter, focused light for reading without affecting the whole room.
10–20 lm/sq ftSee how a lumens target breaks down, step by step.
These steps cover the essentials: measuring the room, applying the right foot-candle target, and converting that target into an actual bulb count.
Measure the room
Start with room length and width to get the square footage before applying a foot-candle target.
Apply the right foot-candle target
Task-heavy rooms like kitchens and offices need a higher target than relaxed spaces like bedrooms.
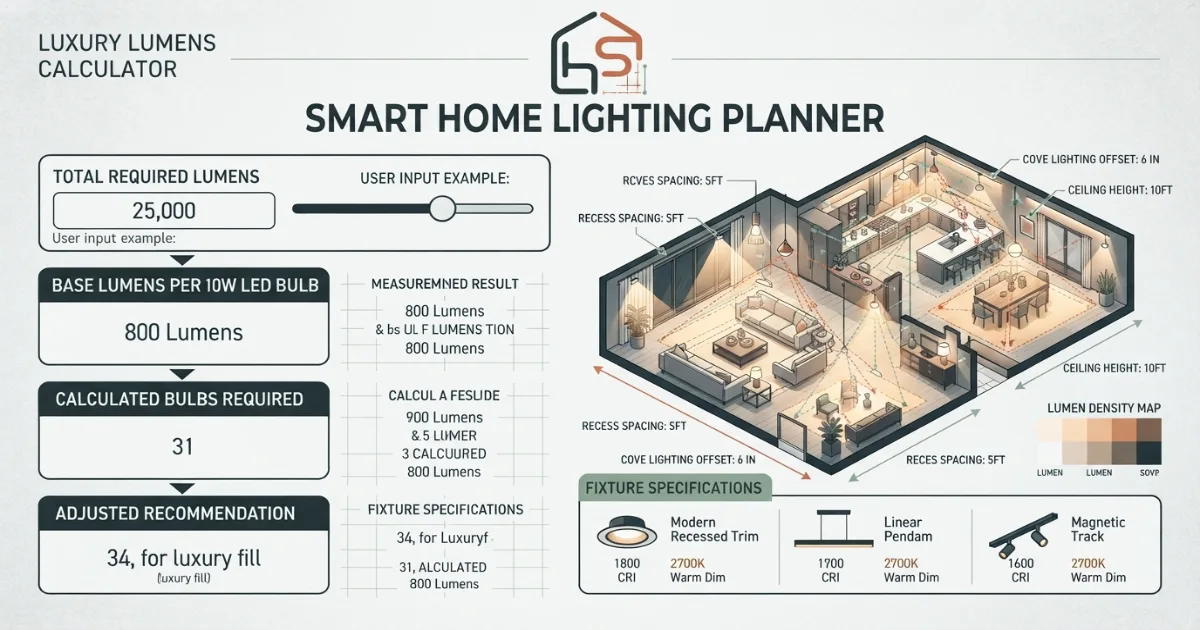
Convert to a bulb count
Dividing total lumens by the lumens rating of your chosen bulb gives the number of bulbs needed.
How to calculate lumens for a room — the complete guide.
The most common lighting mistake is shopping for bulbs by watts instead of lumens. Watts measure electricity consumed, not brightness produced, and since LED bulbs produce far more light per watt than older incandescent bulbs, comparing wattage alone leads to rooms that are either underlit or needlessly overlit. Always plan a room’s lighting around its total lumens target, then choose whichever wattage bulb delivers that lumens figure most efficiently.
Step 1: Measure the room and calculate its square footage
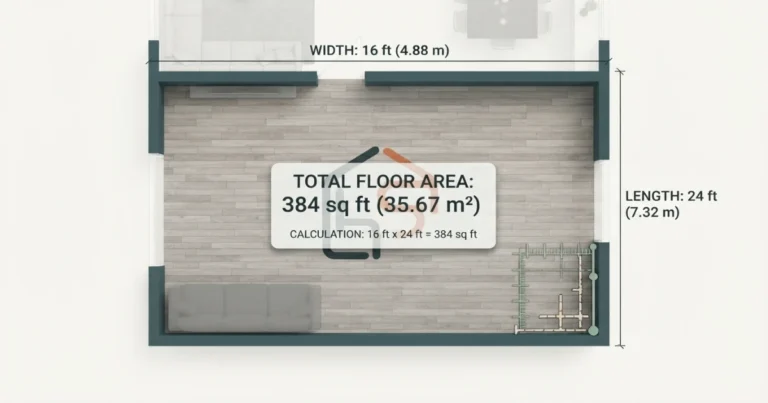
Start by measuring the room’s length and width in feet, then multiply them together to get the total square footage. For irregularly shaped rooms, break the space into simple rectangles, calculate each section separately, and add the results together. This square footage figure is the foundation every subsequent lumens calculation is built on, so an accurate measurement here matters more than any other single step.
Step 2: Understand what a foot-candle actually measures
A foot-candle is a standard unit of illuminance, defined as one lumen spread evenly over one square foot of surface area. This is a useful shortcut because it means foot-candles and lumens per square foot are numerically the same figure, just expressed in different units, which is why lighting designers use foot-candle targets to describe how bright a space needs to be before converting that target into a specific lumens number for the room’s actual size.
Step 3: Choose the right foot-candle target for the room’s primary use
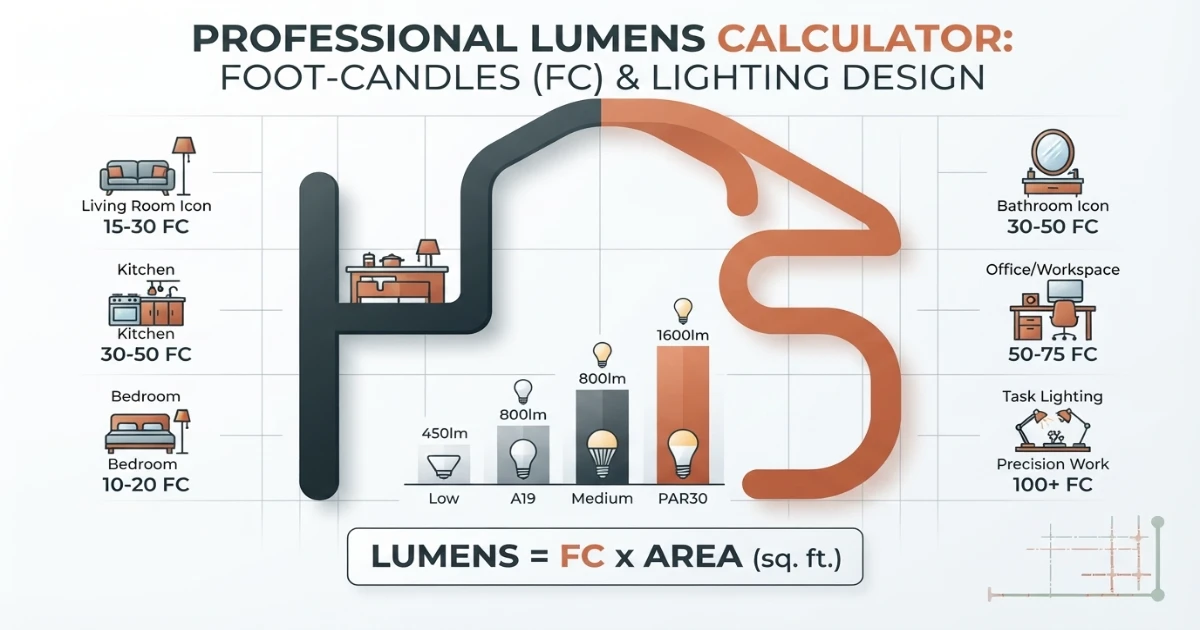
Different rooms need dramatically different brightness levels depending on the tasks typically performed in them. A bedroom or living room, used mostly for relaxing and socializing, generally needs 10 to 20 foot-candles of ambient light. A kitchen or home office, where detailed tasks like chopping vegetables or reading fine print happen regularly, needs 30 to 50 foot-candles. Bathrooms sit in between at 20 to 40 foot-candles, with additional concentrated light needed directly at the mirror for grooming tasks.
Step 4: Multiply the target by the room’s square footage
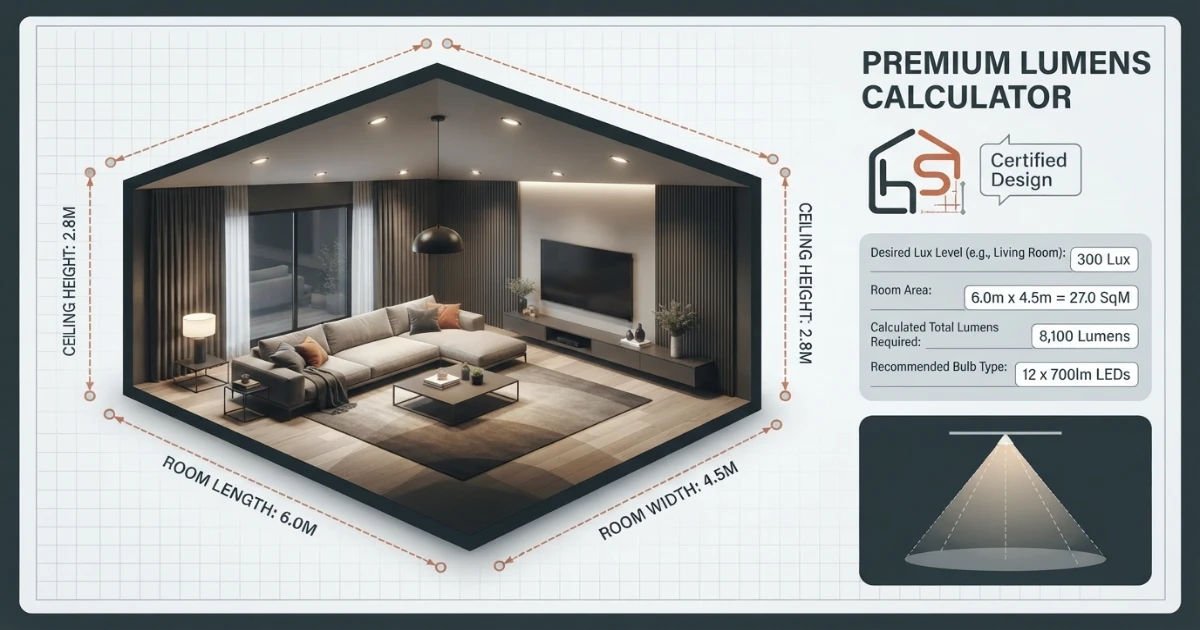
Once a foot-candle target is chosen, multiply it by the room’s total square footage to get the total lumens needed for that space. A 150 square foot living room at a standard 15 foot-candle target needs roughly 2,250 total lumens, while the same size kitchen at a 35 foot-candle target needs around 5,250 lumens, nearly two and a half times as much light for the same floor area.
Step 5: Adjust the target for the desired mood or brightness level
The foot-candle figures above assume a standard brightness level, but rooms can reasonably sit above or below that baseline depending on personal preference and specific use. A more relaxed, ambient mood might use 70 to 80 percent of the standard target, while a bright, task-focused space, such as a hobby room or a kitchen used for detailed cooking, might call for 120 to 140 percent of the standard figure.
Step 6: Understand the difference between lumens and watts
Lumens measure the actual quantity of visible light a bulb produces, while watts measure the electrical power the bulb consumes to produce that light. Older incandescent bulbs were inefficient enough that watts became a rough, informal proxy for brightness, since a 60 watt incandescent bulb reliably produced about 800 lumens. LED bulbs break this old assumption completely, since an LED bulb can produce the same 800 lumens using only 8 to 10 watts of actual power, making watts a poor and increasingly outdated way to shop for bulb brightness.
Step 7: Convert total lumens into a bulb count
Once the total lumens target for a room is known, divide it by the lumens rating of the specific bulb you plan to use to get the number of bulbs needed. This lumens rating is printed directly on the bulb’s packaging, typically alongside its wattage and color temperature, and varies by bulb type and manufacturer even among bulbs that look similar or are marketed with the same wattage-equivalent label.
Step 8: Spread bulbs across multiple fixtures rather than one
A single overhead fixture, even with a very high lumens bulb installed, rarely lights a room evenly, since light intensity falls off quickly with distance and a single point source creates harsh shadows in corners and along walls. Spreading the total lumens target across two or three fixture types, such as an overhead fixture, a floor or table lamp, and under-cabinet or accent lighting, produces a more even, comfortable result than concentrating all the light in one place.
Step 9: Layer ambient, task, and accent lighting separately
Professional lighting design generally separates a room’s lighting into three layers: ambient lighting that provides overall room illumination, task lighting that’s brighter and more focused for specific activities like reading or food prep, and accent lighting that highlights specific features like artwork or architectural details. Calculating a single lumens target for the whole room provides a starting point for the ambient layer, with task and accent lighting typically added on top in the specific areas that need them.
Step 10: Account for ceiling height above the standard 8 feet
Most lumens-per-square-foot guidelines assume a standard 8 foot ceiling height. Rooms with taller ceilings, such as a vaulted living room or a converted loft space, generally need 10 to 20 percent more total lumens than the base calculation suggests, since light has to travel farther from the fixture to reach work surfaces and furniture below, and it spreads out more over that additional distance, reducing its effective intensity at floor level.
Step 11: Account for wall and surface colors
Darker wall colors, flooring, and furniture absorb more light than they reflect, which means a room finished in deep, saturated colors can feel noticeably dimmer than the same room finished in lighter tones, even with an identical lumens output installed. A room with predominantly dark surfaces benefits from a lumens target on the higher end of the standard range for its room type to compensate for this reduced reflectivity.
Step 12: Consider natural light availability
A room with abundant natural light from large windows may need less artificial lighting during daytime hours, but evening and nighttime use still requires the full calculated lumens target, since natural light isn’t available then regardless of the room’s daytime brightness. Calculating the lumens target based on evening use, rather than daytime appearance, avoids underestimating a room’s actual lighting needs.
Step 13: Choose the right color temperature alongside lumens
Color temperature, measured in Kelvin, describes whether a bulb’s light appears warm and yellowish or cool and bluish, and it’s a separate specification from lumens that still affects how bright and comfortable a space feels. Warm white light around 2700 to 3000K suits most living spaces and bedrooms, while cooler light around 3500 to 4000K or higher often suits kitchens, bathrooms, and home offices where a crisper, more alert quality of light supports focused tasks.
Step 14: Plan for dimmers to add flexibility
Installing dimmable fixtures and dimmable-compatible bulbs allows a room’s actual light output to be adjusted below its calculated maximum for different times of day and different activities, without needing separate lighting setups for daytime tasks versus evening relaxation. Not all LED bulbs are dimmer-compatible, so this needs to be confirmed on the bulb’s packaging before installation if a dimmer switch is planned.
Step 15: Recalculate after any major furniture or layout change
Moving furniture, repainting in a significantly darker or lighter color, or converting a room’s primary use, such as turning a bedroom into a home office, all shift the lumens target that room actually needs. Revisiting the calculation after any of these changes, rather than assuming the original lighting plan still fits, helps catch a room that’s become noticeably too dim or unnecessarily bright for its new layout or purpose.
Step 16: Test the final lighting plan in the evening before finalizing
Once bulbs are installed, evaluate the room’s actual brightness in the evening, when natural light isn’t a factor, rather than relying on a daytime impression. If a space still feels too dim or too harsh once installed, it’s easier to swap individual bulbs for a different lumens rating or color temperature at this stage than to discover the mismatch well after fixtures are fully wired and finished.
Lighting rules that prevent a room that’s too dim or too harsh.
A calculator gives the best starting numbers, but the final lighting plan still depends on wall colors, ceiling height and how many fixtures share the load. The rules below cover the details worth checking before buying bulbs.
Multiply the room’s square footage by 10 to 20 lumens per square foot for relaxed, ambient spaces, or 30 to 50 lumens per square foot for task-heavy rooms, then divide the total by your chosen bulb’s lumens rating to get the bulb count needed.
Shop by lumens, not watts
Watts measure power used, not brightness produced. Compare bulbs by their lumens rating for an accurate brightness comparison.
Spread lumens across fixtures
A single bright bulb rarely lights a room evenly. Splitting the total across two or three fixtures avoids harsh shadows.
Adjust for ceiling height and dark colors
Add 10 to 20 percent more lumens for ceilings above 8 feet or rooms finished in darker, less reflective colors.
Match color temperature to the room’s use
Warm light suits relaxing spaces; cooler light suits kitchens, bathrooms and offices where focus matters more.
Helpful room planning topics.
Lighting rarely gets planned in isolation from the rest of a room. Once you know your lumens target, it helps to plan the surrounding elements at the same time — the furniture layout the light needs to reach, and any nearby chandelier or fixture sizing. Use these supporting pages from the HomeStyle Calculator homepage to plan the rest of the room.
Six things lighting designers always check before finalizing a plan.
Test bulbs before buying a full set
Buy one bulb first and live with it in the room for a few evenings before committing to enough bulbs for every fixture in the space.
Layer at least two light sources per room
Relying on a single overhead fixture almost always creates flat, shadow-heavy lighting compared to combining overhead and lamp-level sources.
Keep color temperature consistent in one room
Mixing warm and cool bulbs in the same space reads as visually jarring, even if the total lumens output is correct.
Add extra light directly at task zones
Under-cabinet lighting in kitchens and a dedicated desk lamp in offices matter more for actual usability than raising the whole room’s ambient level.
Confirm dimmer compatibility before wiring
Not every LED bulb works with every dimmer switch. Check compatibility on the packaging before finalizing a dimmable fixture plan.
Reassess lighting after a repaint
A significantly darker or lighter wall color changes how bright a room feels even with the same bulbs installed, so it’s worth reassessing afterward.
Lumens questions — answered.
More calculators for every room decision.
Every tool uses professional designer formulas. Free, instant, no sign-up — just enter your room and get the exact answer.
Bookmark HomeStyle Calculator for every room in the house.
From a reading nook to a full kitchen remodel, our free tools give you the exact lighting, layout and cost before you buy a single bulb.