Order the exact amount of flooring, not a guess.
Enter your room’s width and length, pick a flooring type and install pattern, and this flooring calculator works out the square footage, waste allowance, box coverage and total boxes to buy — instantly, and matched to how flooring retailers actually sell material. No more coming up two boxes short on installation day, and no more paying for a stack of unused planks.
Multiply room width by length for square footage, add 7 to 10 percent waste for a straight install (more for diagonal or herringbone), then divide by the coverage per box and round up to the next full box.
Standard waste and coverage by flooring type.
These figures assume a straight install pattern unless noted. Use the calculator above for a quantity matched to your exact room and pattern.
| Flooring Type | Typical Waste % | Box Coverage | Underlayment | Notes |
|---|---|---|---|---|
| Solid hardwood | 7–10% | 18–24 ft² / box | Usually required | Acclimate 48–72 hrs before install |
| Laminate | 7–10% | 20–26 ft² / box | Foam or attached pad | Click-lock, floating install |
| Ceramic or porcelain tile | 10–15% | 12–18 ft² / box | Cement backer board | Add more waste for diagonal set |
| Vinyl plank (LVP) | 7–10% | 24–36 ft² / box | Optional underlayment | Waterproof, floating or glue-down |
| Diagonal pattern (any type) | 15% | Varies by type | Varies by type | More angled cuts, more offcuts |
| Herringbone / chevron | 20%+ | Varies by type | Varies by type | Every plank cut at an angle |
Four common flooring types — and the quantity rule each one follows.
The material you choose changes both the waste percentage and the box coverage that apply. Here is what each type is built for and the ordering logic behind it.
Solid Hardwood
Long, narrow planks that need modest waste for straight runs but rise quickly once a diagonal or herringbone pattern is chosen. Needs an acclimation period before install.
Waste: 7–10%Laminate
A click-lock floating floor over a foam pad, with waste and coverage very close to hardwood, but generally the most forgiving and affordable option to order for.
Waste: 7–10%Ceramic or Porcelain Tile
Rigid pieces that are far less forgiving to cut than plank flooring, so waste allowances run higher, especially once grout lines and diagonal layouts are factored in.
Waste: 10–15%Vinyl Plank (LVP)
A waterproof floating or glue-down floor with the widest box coverage of the four types, making it a common choice for kitchens, bathrooms and basements.
Waste: 7–10%See how flooring quantity changes by pattern and coverage.
These steps cover the essentials: measuring the room, applying the right waste formula for your pattern, and checking box coverage before you order.
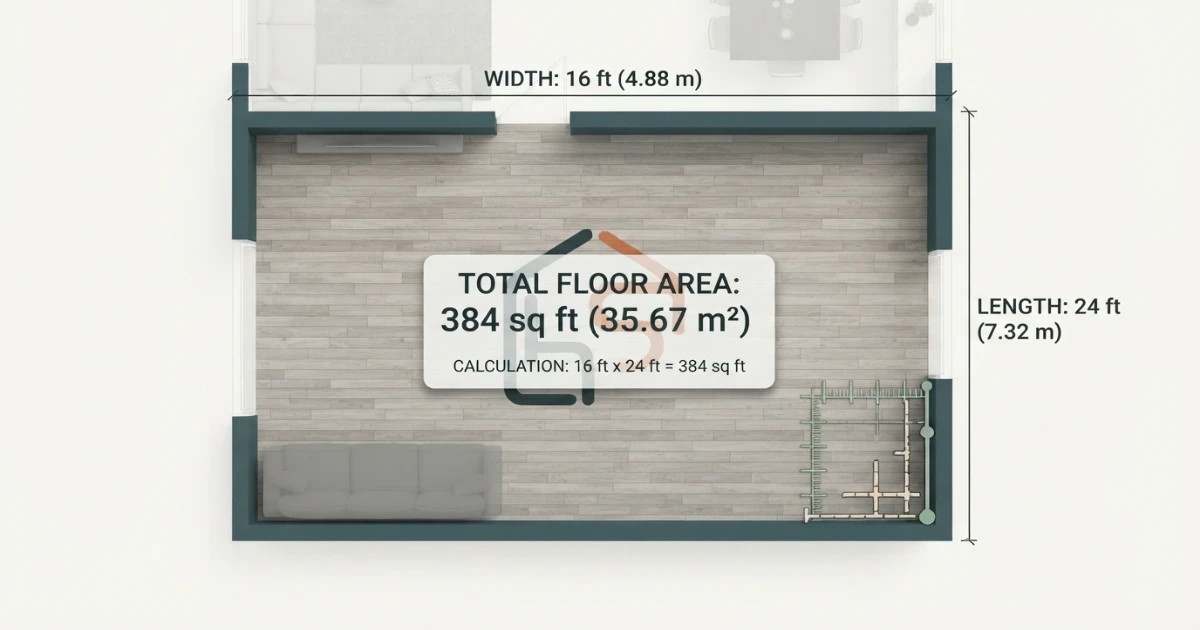
Measure the room
Start with room width and length, including closets and alcoves that will receive the same flooring.
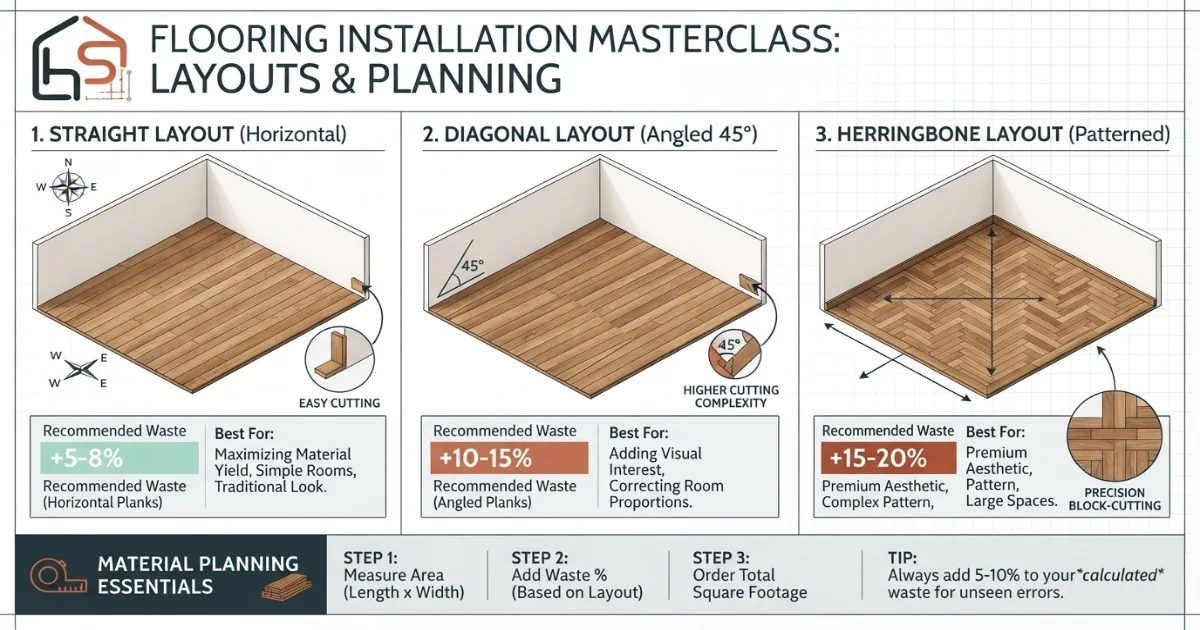
Apply the right waste %
Straight installs need less extra material than diagonal or herringbone patterns, which involve more angled cuts.
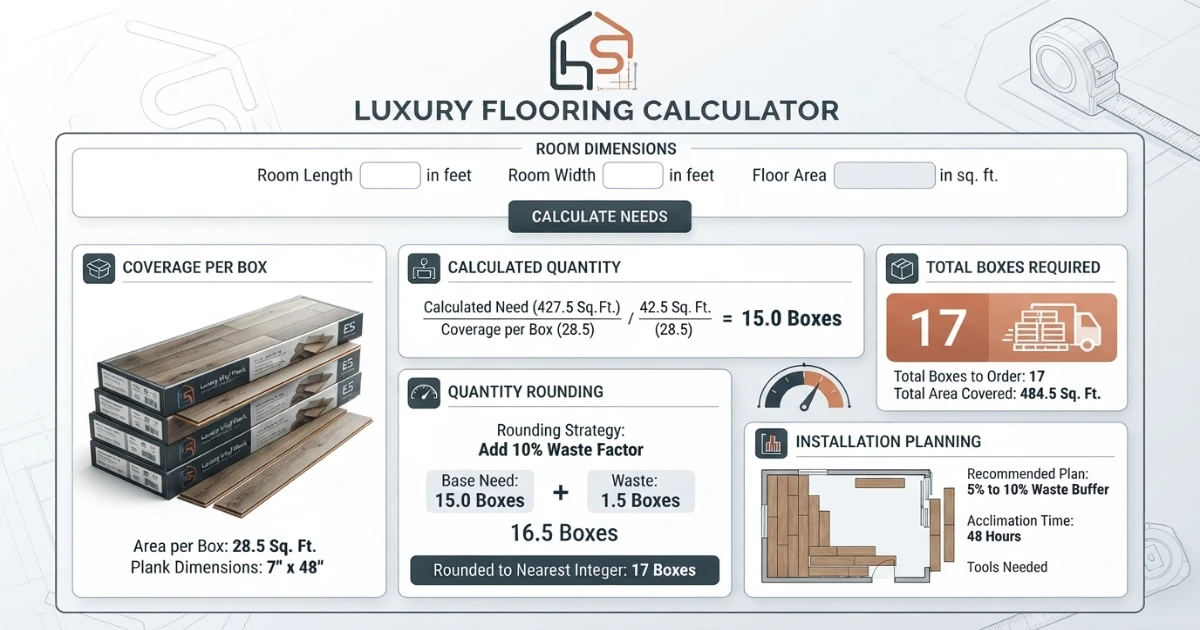
Check box coverage
Confirm the exact coverage per box printed on your chosen product, then round up to the nearest full box.
How to calculate flooring quantity — the complete guide.
The most common flooring-ordering mistake is calculating square footage and buying that exact amount, with no waste allowance at all. Every cut piece around a doorway, closet or wall produces an offcut that usually can’t be reused elsewhere, and dye lots vary between production runs, so a second order to cover a shortfall may not match the first. Adding the right waste percentage up front, based on the flooring type and install pattern, is what actually prevents a mid-project scramble.
Step 1: Measure the room and calculate square footage
Start by measuring the room’s width and length in feet, then multiply the two figures together to get the base square footage. For an irregularly shaped room, break the floor plan into smaller rectangles, calculate each one’s square footage separately, and add the totals together before moving on to the waste calculation. Always measure at the widest points of the room, since a slightly bowed wall or an angled corner can otherwise leave the final number a little short.
Step 2: Include every space that gets the same flooring
Closets, alcoves, and any nook that will receive the same material need to be added into the total square footage, even though they’re easy to overlook when standing in the middle of a room with a tape measure. Skipping a closet is one of the most common reasons a flooring order comes up short partway through installation, and reordering later often means a different dye lot or batch that doesn’t match the first delivery exactly.
Step 3: Choose the flooring type before setting a waste percentage
Hardwood, laminate, tile and vinyl plank each carry a different default waste allowance, because each material behaves differently once it’s being cut and fitted. Rigid materials like tile are less forgiving of small measurement errors than a flexible click-lock laminate, and that difference is reflected directly in the waste percentage that should be applied to the base square footage.
Step 4: Understand why waste percentage exists at all
Waste percentage covers the material lost to cutting boards or tiles to fit around doorways, closets, vents, and irregular wall angles, plus a buffer for any pieces damaged during handling or installation. It is not a padding number added out of caution; it reflects a real, predictable category of material that will not end up as visible flooring, regardless of how careful the installer is.
Step 5: Apply a higher percentage for diagonal layouts
A diagonal install, where planks or tiles run at 45 degrees to the walls instead of parallel to them, typically needs around 15 percent waste rather than the 7 to 10 percent used for a straight run. Every edge piece along the room’s perimeter requires an angled cut, and those angled offcuts are far less likely to be reusable elsewhere in the layout than the straight offcuts produced by a standard install.
Step 6: Apply an even higher percentage for herringbone or chevron
Herringbone and chevron patterns push waste allowances to 20 percent or more, since every single piece in the pattern is cut at an angle, and the repeating zigzag or arrow shape leaves very little room to reuse an offcut anywhere else in the room. These patterns also take longer to install, so factoring in the higher material cost alongside the added labor time helps set expectations before work begins.
Step 7: Add the waste percentage to the base square footage
Once the base square footage and the waste percentage are both known, multiply the square footage by the waste percentage and add that figure to the original total. A 200 square foot room with a 10 percent waste allowance, for example, needs 220 square feet of flooring ordered, not 200, even though only 200 square feet will end up visible on the floor once installation is complete.
Step 8: Check the exact box coverage printed on the product
Box coverage varies meaningfully between manufacturers and even between different lines from the same manufacturer, so never assume a round number like 20 square feet per box without confirming it on the specific product being purchased. This figure is usually printed directly on the box or listed in the product specifications on the retailer’s website, and it should always take priority over any generic average used for early planning.
Step 9: Divide total square footage by box coverage
Once the total square footage, including waste, is known, divide that number by the coverage per box to find how many boxes are needed. A 220 square foot total divided by 20 square feet per box comes out to 11 boxes exactly, but most real rooms won’t divide evenly, which is why the next step matters just as much as the division itself.
Step 10: Always round up to the next full box
Manufacturers sell flooring in full box increments only, so any decimal result from the division in the previous step needs to be rounded up, never down and never to the nearest whole number. A calculation that comes out to 10.2 boxes still requires 11 full boxes, since a partial box isn’t something a retailer will sell, and running short by even a fraction of a box mid-installation is far more disruptive than having one extra box left over.
Step 11: Factor in underlayment and moisture barriers separately
Underlayment, foam padding, and moisture barriers are typically sold and calculated separately from the flooring material itself, often in rolls rather than boxes, and usually need less waste allowance than the flooring since they’re cut in larger, more forgiving sheets. Confirm whether the flooring type chosen requires underlayment at all, since some vinyl and laminate products come with an attached pad and skip this step entirely.
Step 12: Budget for baseboard and transition strips
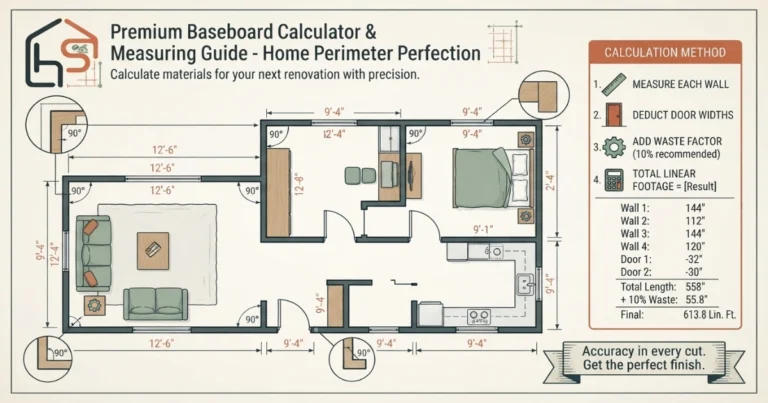
Baseboard, quarter round, and transition strips between rooms are usually calculated by linear footage around the room’s perimeter rather than by square footage, and they’re easy to forget when focused on the floor itself. Measure the perimeter of the room separately, and check whether existing baseboard will be reused or needs replacing to match the new floor height.
Step 13: Consider ordering extra for future repairs
Beyond the waste percentage used during installation, many homeowners set aside a small additional amount, often one extra box, to have on hand for future repairs if a plank or tile is damaged years later. This is especially worth considering for a flooring line that might be discontinued, since matching a replacement piece from a different production run later can be difficult or impossible.
Step 14: Understand how plank direction affects waste
Running planks the long way across a room typically produces fewer full-length cuts and less waste than running them the short way, particularly in a narrow room where the plank length doesn’t divide evenly into the room’s width. Before finalizing an order, it’s worth sketching or visualizing which direction the planks will run, since this decision affects both the waste percentage and the visual proportions of the finished room.
Step 15: Adjust the approach for a small or oddly shaped room
Smaller rooms often see a proportionally higher effective waste rate than large open rooms, because a fixed number of cut pieces around doorways and closets makes up a larger share of a smaller total area. For an awkwardly shaped or angled room, breaking the space into rectangles as described in step one, then applying the waste percentage to the summed total rather than to each piece individually, produces a more accurate final quantity.
Step 16: Decide between DIY and professional installation buffers
A first-time DIY installer typically benefits from a slightly higher waste allowance than a professional crew, since less cutting experience usually means a few more measuring mistakes and wasted pieces along the way. Adding an extra percentage point or two on top of the standard recommendation is a reasonable adjustment for a DIY project, particularly one involving a diagonal or herringbone pattern for the first time.
Step 17: Confirm the final order before checkout
Before finalizing a flooring order, recheck the room’s square footage against the original measurements, confirm the waste percentage matches the chosen install pattern, and verify the box coverage against the specific product page rather than a remembered average. This final check catches the majority of ordering mistakes, and it takes only a few minutes compared with the time and cost of a rushed reorder mid-installation.
Ordering rules that prevent a mid-install shortage.
A calculator gives the best starting numbers, but the final order still depends on the exact product’s box coverage and the room’s real-world cuts. The rules below cover the details worth checking even after settling on a quantity.
Calculate square footage, add 7 to 10 percent waste for a straight install (more for diagonal or herringbone), divide by the exact box coverage on the product, and always round up to the next full box.
Measure before you shop
Get exact square footage, including closets, before browsing flooring so the quantity conversation starts from real numbers.
Match waste to the pattern
Don’t apply a straight-install waste percentage to a diagonal or herringbone layout; the material loss is genuinely different.
Check the product’s real coverage
Confirm the exact box coverage printed on the specific product rather than assuming a round, average number.
Round up, and keep the receipt
Round to the next full box every time, and keep an extra box on hand for repairs from the same dye lot.
Helpful flooring and room planning topics.
A flooring order rarely comes together from square footage alone. Once quantity is settled, it helps to plan the surrounding details at the same time — the rug that sits on top of it, the paint on the walls above it, and the furniture layout the new floor supports. Use these supporting pages from the HomeStyle Calculator homepage to plan the rest of the room.
Six things flooring pros always check before ordering.
Buy all boxes from one production run
Dye lots vary between runs, so buying every box for a room at once avoids a visible color mismatch across the finished floor.
Let hardwood acclimate first
Solid hardwood needs 48 to 72 hours in the room before install so it adjusts to local humidity and doesn’t shift afterward.
Don’t skip the underlayment calculation
Underlayment and moisture barriers are bought separately from flooring, usually by the roll, and are easy to forget when focused on boxes.
Sketch plank direction before ordering
Running planks the long way across a room usually produces fewer cuts and less waste than running them the short way.
Keep one spare box for repairs
Set aside an extra box from the same order in case a plank or tile ever needs replacing years down the line.
Re-measure after demo, not before
If old flooring is being removed first, confirm final square footage after demo, since subfloor conditions can shift the real number slightly.
Flooring calculator questions — answered.
More calculators for every room decision.
Every tool uses professional designer and installer formulas. Free, instant, no sign-up — just enter your room and get the exact answer.
Bookmark HomeStyle Calculator for every room in the house.
From a small closet to a whole-home flooring project, our free tools give you the exact square footage, waste allowance and box quantity before you order.