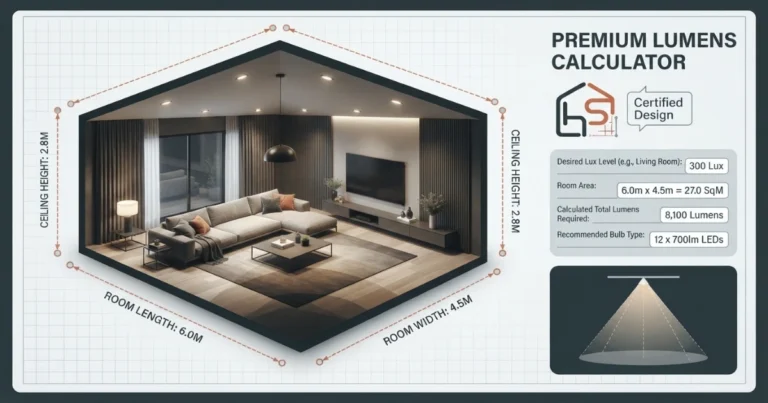
Find the Right Lumens, Bulb Count, and Wattage for any Room.
Enter your room dimensions, choose a room type and lighting layer, and get an instant lighting recommendation — using the same foot-candle targets electricians and lighting designers rely on. No guesswork, no dim corners, and no wasted watts on an over-lit space.
Standard lumens by room type.
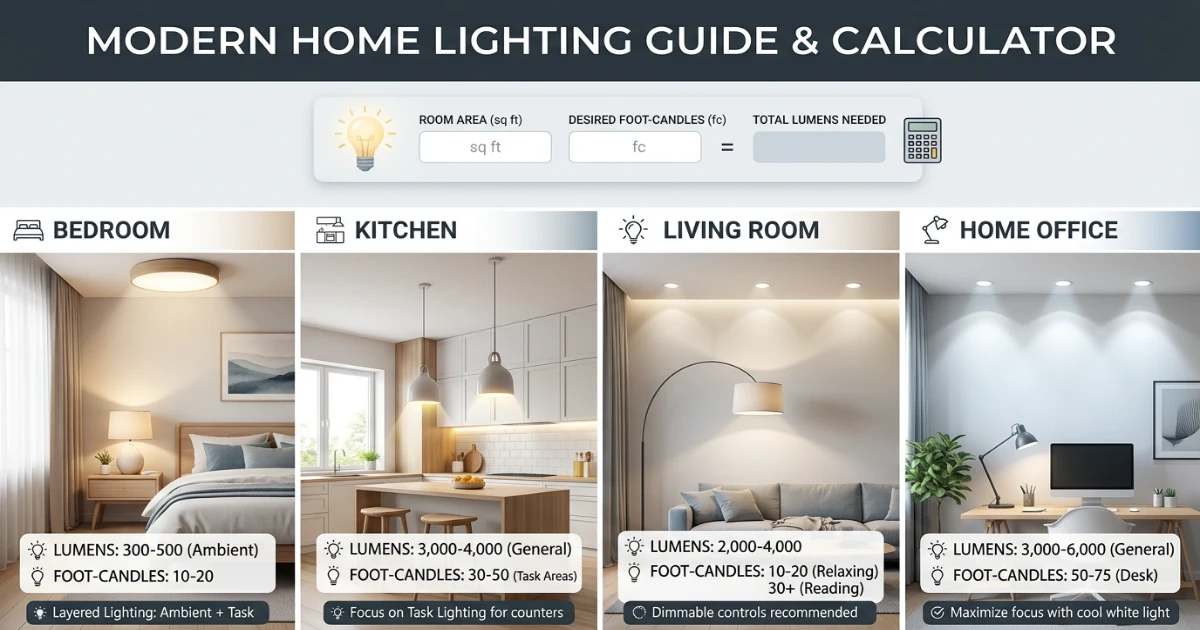
These estimates assume ambient lighting and a standard 8 foot ceiling. Use the calculator above for your exact room. Task areas like kitchens and bathrooms need noticeably more light per square foot than living spaces, so treat the table as a starting reference rather than a final plan.
| Room Type | Lumens / Sq Ft | 100 Sq Ft Room | 200 Sq Ft Room | Foot-Candles |
|---|---|---|---|---|
| Living Room | 20 lm | 2,000 lm | 4,000 lm | 10–20 fc |
| Bedroom | 20 lm | 2,000 lm | 4,000 lm | 10–20 fc |
| Dining Room | 30 lm | 3,000 lm | 6,000 lm | 20–30 fc |
| Kitchen | 40 lm | 4,000 lm | 8,000 lm | 30–40 fc |
| Home Office | 50 lm | 5,000 lm | 10,000 lm | 30–50 fc |
| Garage / Workshop | 50 lm | 5,000 lm | 10,000 lm | 40–50 fc |
| Bathroom | 70 lm | 7,000 lm | 14,000 lm | 70–80 fc |
Four lighting layers — and how they shift the recommendation.
How a space is used changes how much light it needs. Here is what each layer favors, how it adjusts the recommendation, and which rooms it suits best.
Ambient Lighting
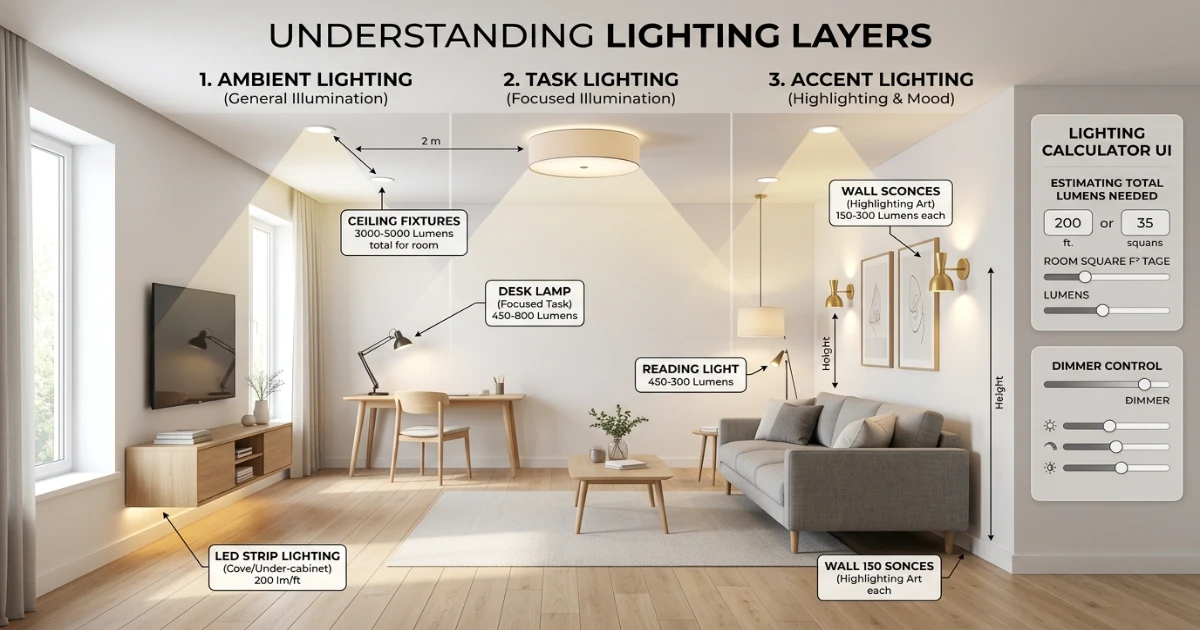
The baseline overall glow of a room. Uses the standard room-type foot-candle target without adjustment — the everyday setting most rooms are designed around.
Ratio: standardTask Lighting
Focused light for reading, cooking or working. Pushes the recommendation up by about 50 percent above ambient for a space that stays comfortable under close-up activity.
Ratio: ×1.5Accent Lighting
Highlights art, shelving or architectural features rather than lighting the whole room. Recommends about half of the ambient target, since it supplements rather than replaces general light.
Ratio: ×0.5Layered Lighting
Combines ambient, task and accent sources on separate switches or dimmers so the room adapts through the day. Recommends about 30 percent above ambient to cover the combined layers.
Ratio: ×1.3See how the ideal lighting changes by room.
These steps cover the essentials: measuring the room, choosing a room type, and matching bulb wattage to the lumens you actually need.
Measure the room
Start with the room’s length and width before choosing a lighting plan. Write both down, since floor area is the base number everything else scales from.
Choose a lighting layer
Ambient, task, accent and layered lighting each call for a different lumens target. This usually changes the recommendation more than room size alone.
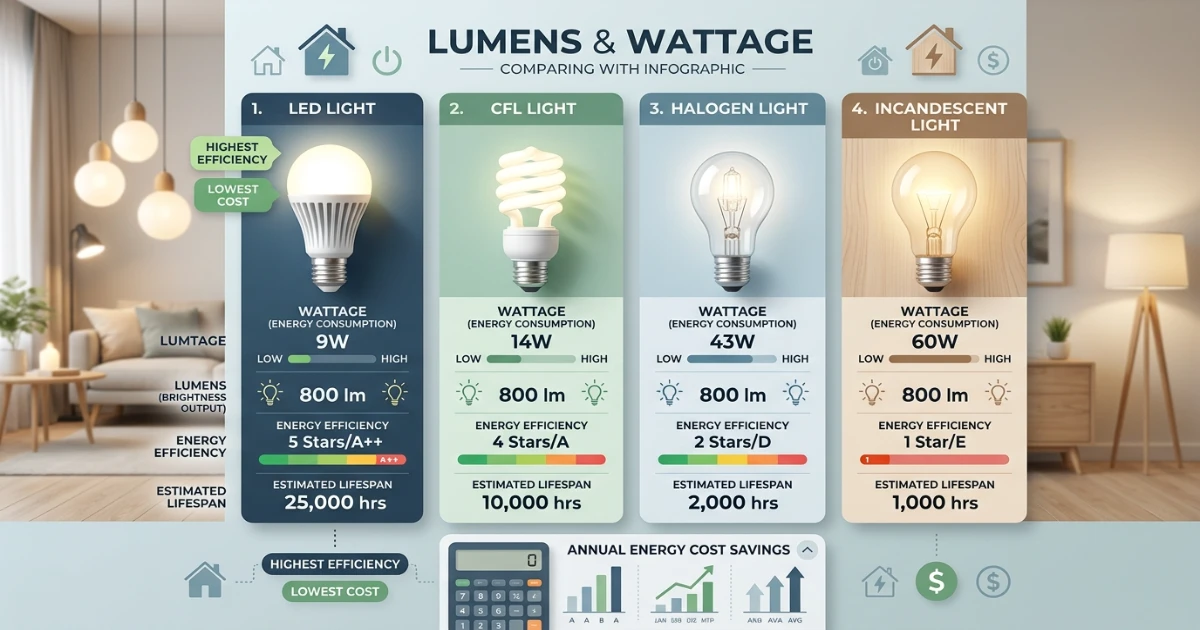
Match bulb type to wattage
The same brightness needs very different wattage depending on bulb type. Always check the wattage breakdown before buying bulbs.
How to calculate room lighting — the complete guide.
The most common lighting mistake is buying bulbs by watts instead of lumens. Watts only tell you how much electricity a bulb uses, not how bright it is. Always plan around total lumens for the room, then pick the bulb type and wattage that delivers that brightness efficiently.
Step 1: Measure the room
Multiply the room’s length by its width to get the floor area in square feet. For irregular rooms, break the space into rectangles, measure each one, and add the areas together for a reasonably accurate total.
Step 2: Choose the room type
Living rooms and bedrooms are comfortable around 20 lumens per square foot. Dining rooms sit a little higher around 30. Kitchens, home offices and garages typically need 40 to 50 lumens per square foot for task work, and bathrooms benefit from the most concentrated light, around 70, particularly at the vanity.
Step 3: Choose a lighting layer
Ambient lighting uses the standard room-type target as-is. Task lighting, for reading nooks, kitchen counters or desks, pushes that target up by about 50 percent. Accent lighting, for art or architectural highlights, only needs about half the ambient target since it supplements rather than replaces the main light. Layered lighting, which combines all three on separate circuits, plans for roughly 30 percent above the ambient baseline.
Step 4: Account for ceiling height
Standard 8 foot ceilings need no adjustment. Raised ceilings around 9 to 10 feet spread light over more volume, so add roughly 10 percent to the total lumens. Vaulted or cathedral ceilings above 10 feet call for closer to 15 to 20 percent more, since light has further to travel before it reaches usable surfaces.
Step 5: Convert lumens to bulb count
Divide the total recommended lumens by 800, the output of a standard bulb, to get an approximate bulb or fixture count. Round up rather than down, since slightly under-lighting a room is a more common complaint than slightly over-lighting it.
Step 6: Convert lumens to wattage
Divide total lumens by the bulb type’s efficacy in lumens per watt: roughly 90 for LED, 60 for CFL, 20 for halogen, and 15 for incandescent. This is why an LED setup that matches an incandescent room’s brightness uses a fraction of the electricity.
Step 7: Balance brightness with comfort
A room lit exactly to the foot-candle target on paper can still feel harsh if all of the light comes from a single overhead fixture. Splitting the same total lumens across two or three fixtures, or adding a dimmer, usually feels more comfortable than one bright source doing all the work.
Step 8: Avoid the most common lighting mistakes
Shopping by watts instead of lumens is the most frequent mistake, since it compares bulbs that aren’t actually equivalent in brightness. Lighting only the room’s center and leaving corners dim is another, especially in larger rooms that need more than one fixture. Finally, skipping the ceiling height adjustment in a room with vaulted ceilings often leaves the space feeling dimmer than the numbers suggest.
Step 9: Match lighting to daily routines
A kitchen used mainly for quick breakfasts and reheating leftovers doesn’t need the same brightness as one where someone cooks from scratch every night. Walk through a typical day in the room before finalizing a plan: morning routines often want brighter, cooler light to help with alertness, while evening use in the same space usually calls for warmer, dimmer settings. Rooms that serve double duty, like a guest bedroom that doubles as a home office, benefit most from a layered approach with independent switches, since a single fixed brightness rarely suits both purposes well.
Step 10: Consider natural light and wall color
Two identical rooms can need different amounts of artificial light depending on how much daylight they receive and how their walls are finished. A north-facing room with small windows will feel dimmer than the calculator’s baseline suggests, so it’s reasonable to lean toward the brighter end of the recommended range. Dark wall colors and matte finishes absorb more light than pale, glossy ones, which means a deep charcoal accent wall can noticeably reduce how bright a room feels even with the same total lumens installed. Neither factor changes the math in a strict sense, but both are worth weighing before locking in a final bulb count.
Bulb types: LED, CFL, halogen and incandescent
- LED — the most efficient option at roughly 90 lumens per watt, with the longest lifespan and the lowest running cost, though the highest upfront price per bulb.
- CFL — mid-range efficiency around 60 lumens per watt, cheaper upfront than LED but with a shorter lifespan and a warm-up delay to full brightness.
- Halogen — closer to incandescent at around 20 lumens per watt, valued for crisp white light and dimmability, but runs hot and uses noticeably more power than LED.
- Incandescent — the least efficient at around 15 lumens per watt, now largely phased out for general use but still common in appliance and decorative fixtures.
Lighting rules that prevent a dim or over-lit room.
A calculator gives the best starting numbers, but the final plan still depends on room shape, existing windows, and how the space is used day to day. The rules below cover the details a single lumens figure can’t capture on its own, and they’re worth reviewing even after you’ve settled on a total from the calculator above.
For most living rooms, multiply the floor area by 20 lumens per square foot for ambient light, then split that total across two or three fixtures rather than one. If the ceiling is above 9 feet, add roughly 10 to 15 percent more lumens to compensate for the extra volume.
Shop by lumens, not watts
Watts measure electricity used, not brightness. Compare bulbs by their lumen output so you’re actually comparing how bright each option will be.
Split light across multiple sources
A single bright overhead fixture often feels harsher than the same total lumens split across two or three fixtures at different heights around the room.
Match color temperature to the room
Warm white (2700–3000K) suits living rooms and bedrooms, while cooler white (3500–4000K) suits kitchens and workspaces where alertness and detail matter more.
Confirm dimmer compatibility
Not every LED bulb works with every dimmer switch. Check that the bulb is explicitly rated as dimmable and, where possible, matched to the dimmer brand before installation.
Finally, if the room hosts multiple activities, plan for the most demanding one, typically task work like cooking or reading, and rely on dimmers or accent lighting for lighter moods like movie nights or entertaining. A plan that’s right for close-up work rarely feels wrong for a relaxed evening.
Helpful room planning topics.
Lighting rarely stands alone in a room’s design. Once you know the lumens and bulb count, it helps to plan the surrounding elements at the same time — furniture layout so fixtures don’t cast shadows over seating, curtain choices that affect daytime light, and paint color, which changes how much light a room reflects versus absorbs. Use these supporting pages from the HomeStyle Calculator homepage to plan the rest of the room.
Six things lighting designers always check before wiring a room.
Plan switches before fixtures
Decide which fixtures share a switch and which get their own before running wire. Splitting ambient and task lighting onto separate switches gives far more control later.
Layer instead of centering one fixture
A single center fixture rarely lights a whole room evenly. Combine an overhead source with lamps or wall sconces so corners aren’t left dim.
Keep color temperature consistent
Mixing warm and cool bulbs in the same room reads as visually inconsistent. Pick one color temperature per space, even across different fixture types.
Account for existing daylight
A room with large south-facing windows may need less artificial ambient light during the day but the same amount, or more, in the evening. Dimmers handle this better than fixed brightness.
Check fixture wattage ratings
Every fixture has a maximum wattage rating. Confirm the bulb you’re installing doesn’t exceed it, even if the bulb itself is a cooler-running LED.
Test bulbs before buying in bulk
Color temperature and brightness can look different in a store display than on a home ceiling. Buy one bulb first, install it, and confirm it looks right before purchasing the full set.
Lighting sizing questions — answered.
12 calculators for every room decision.
Every tool uses professional designer formulas. Free, instant, no sign-up — just enter your room and get the exact answer.
Bookmark HomeStyle Calculator for every room in the house.
From a small bedroom to a whole kitchen remodel, our free tools give you the exact lumens and bulb count before you buy.