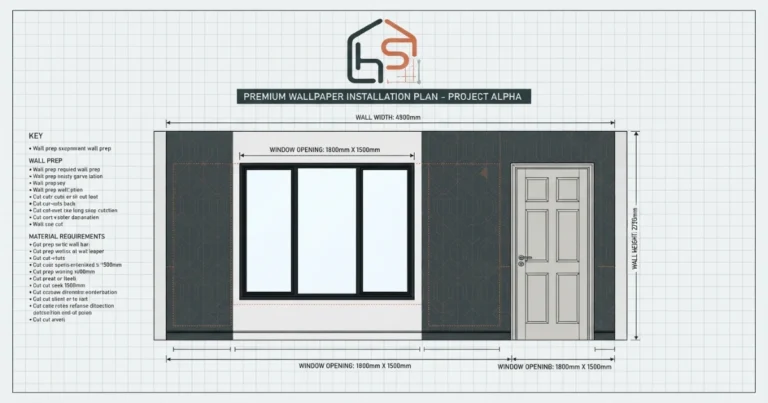
Order the Right Amount of Backsplash Tile.
Enter your kitchen wall width and backsplash height, pick a tile size, and get an instant tile count, box estimate and waste allowance — so you order enough to finish the job without a second trip for one more box.
Multiply wall width by backsplash height to get the square footage, add 10 to 15 percent for waste around outlets and corners, then round up to full boxes based on each box’s coverage.
Tile coverage and waste by common backsplash tile size.
These estimates assume a standard 18 inch backsplash height with a 12 percent waste allowance. Use the calculator above for a count matched to your exact wall width and tile choice.
| Tile Size | Pieces / Sq Ft | Typical Waste | Box Coverage | Notes |
|---|---|---|---|---|
| Subway 3×6 in | ~9.2 tiles | 10–12% | 8–10 ft² | Classic, low-waste layout |
| Subway 4×8 in | ~5.4 tiles | 10–12% | 9–11 ft² | Fewer grout lines |
| Hexagon 2 in | ~30+ tiles | 12–15% | 7–9 ft² | More edge cuts |
| Mosaic sheet 12×12 in | 1 sheet | 8–10% | 1 sheet ≈ 1 ft² | Sold by the sheet |
| Large format 4×12 in | ~3 tiles | 10–15% | 10–12 ft² | Fewer grout lines, more cut waste |
| Full-height backsplash (any size) | Varies | 15–18% | Varies | Window & outlet cuts add waste |
Five common backsplash tile sizes — and what to expect from each.
Tile size affects piece count, cut waste, and grout line density far more than most people expect before ordering. Here’s what each option is built for.
Subway 3×6
The classic offset-brick backsplash tile. Small enough to fit tight runs cleanly with minimal waste on straight walls.
~9.2 tiles / sq ftSubway 4×8
A larger take on the subway shape, covering more area per tile and leaving fewer grout lines to clean over time.
~5.4 tiles / sq ftHexagon 2″
A distinctive honeycomb pattern that needs more edge cutting at wall boundaries, so budget a higher waste allowance.
12–15% waste typicalMosaic Sheet
Small tiles pre-mounted on a mesh sheet, usually 12×12 inches. Sold and calculated per sheet rather than per individual tile.
1 sheet ≈ 1 sq ftLarge Format
Fewer, bigger tiles create a cleaner, more minimal look, but a damaged or miscut tile wastes more material per mistake.
~3 tiles / sq ftSee how backsplash tile count breaks down, step by step.
These steps cover the essentials: measuring the wall, choosing the right waste allowance, and confirming box coverage before placing a tile order.
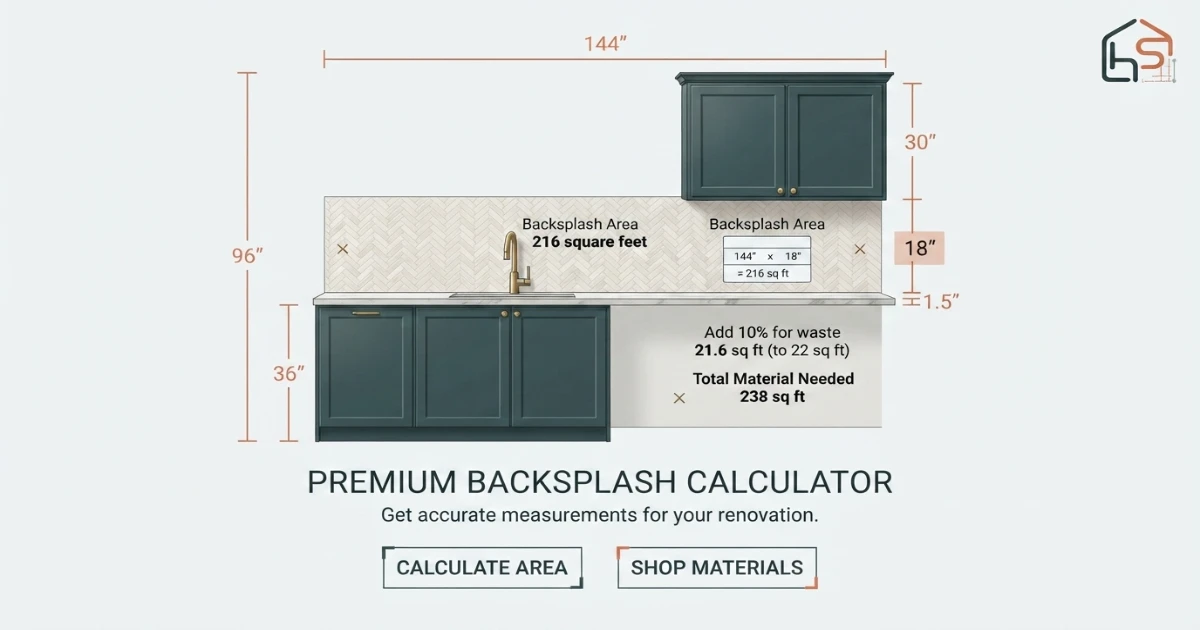
Measure the wall
Start with wall width and backsplash height before pricing any tile. Note outlets, windows and corners.
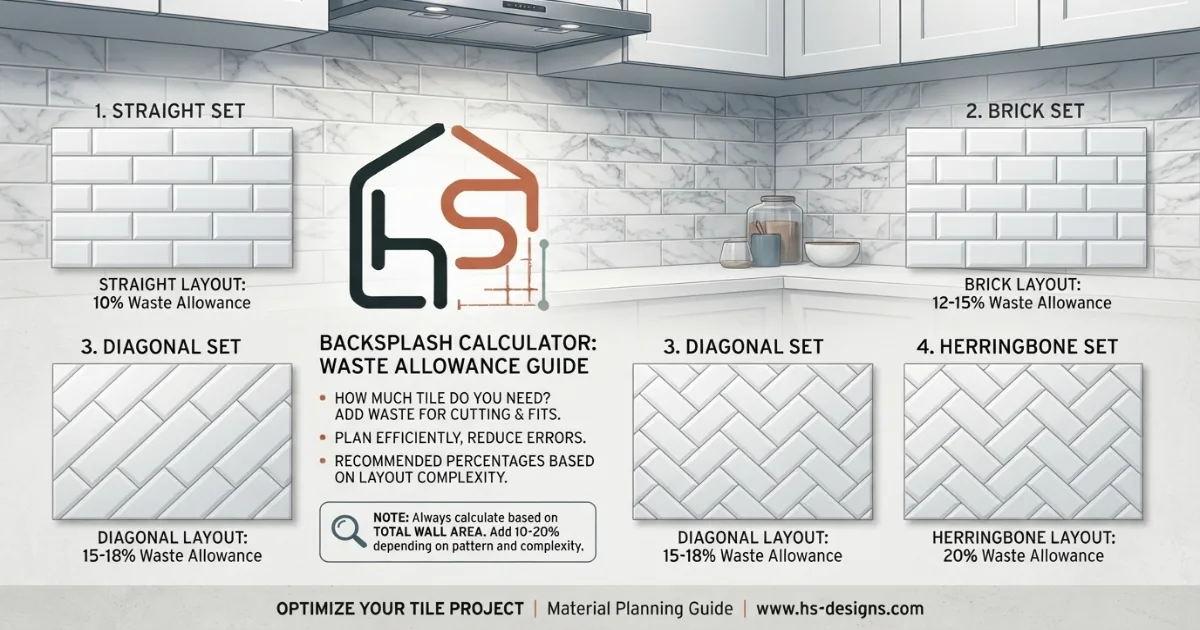
Add the right waste allowance
Straight runs need less extra tile, while outlets, windows and corners push the allowance higher.
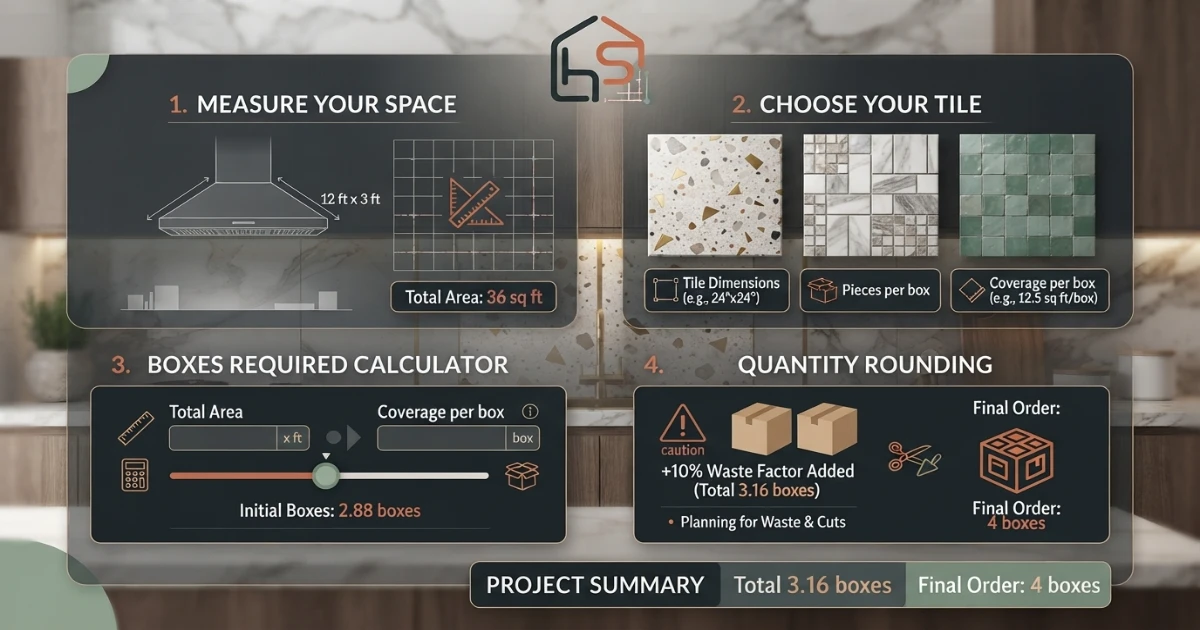
Round up to full boxes
Tile is sold by the box, so the final order always rounds up to the next full box, not the exact tile count.
How to calculate backsplash tile — the complete guide.
The most common backsplash ordering mistake is calculating tile for the flat wall area only and forgetting waste from outlets, corners and windows. A kitchen with two outlets and a window in the backsplash run can easily need 15 to 18 percent more tile than the raw square footage suggests, which is why waste allowance should scale with wall complexity, not sit at one fixed number for every kitchen.
Step 1: Measure the wall width along the counter run
Measure the full length of counter that will receive backsplash tile, including any short returns around a stove hood or window, in feet. Break an L-shaped or U-shaped kitchen into separate wall segments and measure each one individually, then add the segments together rather than trying to measure one continuous curved path.
Step 2: Measure the backsplash height accurately
Standard backsplash height runs 18 inches, filling the gap between the countertop and the underside of the upper cabinets, but this varies by kitchen. Full-height backsplashes that run from the counter to the ceiling, or to the bottom of a range hood, are increasingly common and require measuring the actual vertical distance rather than assuming the standard 18 inch figure.
Step 3: Choose a tile size that matches the kitchen’s scale and style
Smaller tiles like 2 by 2 inch hexagon or 3 by 6 inch subway tend to suit compact kitchens and traditional styles well, while large format tile, 4 by 12 inches or bigger, creates a more minimal, contemporary look with fewer grout lines. Tile size also directly affects the piece count and waste calculation, so settling on a size early keeps the rest of the estimate accurate.
Step 4: Convert wall dimensions into square footage
Multiply the wall width in feet by the backsplash height converted to feet, for example an 18 inch height becomes 1.5 feet, to get the base square footage of the backsplash area. For multiple wall segments, calculate each segment’s square footage separately, then add them together for the total area before applying a waste allowance.
Step 5: Apply a waste allowance sized to the wall’s complexity
A simple, unbroken wall run with no outlets or windows generally needs an 8 to 10 percent waste allowance, while a wall with multiple outlets, a window, or an inside corner needs 12 to 15 percent, and a wall with many cutouts or a diagonal pattern can need 18 percent or more. Underestimating waste is the single most common reason a backsplash project runs short on tile mid-installation.
Step 6: Convert total area into individual tile or sheet count
Once the total square footage including waste is known, divide it by the coverage of a single tile or sheet to get the piece count. For individual tiles like subway or hexagon, this means dividing by the tile’s area in square feet; for mosaic sheets, which are typically sold and priced as a full sheet, the calculation is done per sheet rather than per individual chip.
Step 7: Round the order up to full boxes, not exact tile count
Tile is sold by the box, and box coverage varies by manufacturer, typically landing between 8 and 12 square feet per box. Always round the final quantity up to the next full box rather than ordering the exact calculated square footage, since most suppliers do not sell partial boxes and running one tile short mid-installation, with the original dye lot no longer available, is a common and avoidable frustration.
Step 8: Check that all tile comes from the same dye lot
Natural stone and even some ceramic and porcelain tiles can vary slightly in color and shading between production runs, known as dye lots. Ordering all boxes for a single project from the same dye lot number avoids visible color inconsistencies across the finished backsplash, which is especially noticeable on larger format or lighter-colored tile.
Step 9: Account for outlets, switches and corners in the layout
Every outlet, switch, and inside or outside corner along the backsplash run requires individual tile cuts, and these cuts rarely use the full leftover piece from a previous cut cleanly. Walking through the wall and counting these features before finalizing the waste percentage gives a more accurate order than applying a single flat percentage to every kitchen regardless of its layout.
Step 10: Decide whether the backsplash continues behind appliances
Some kitchens tile the full wall continuously behind the stove and refrigerator, while others stop the backsplash at the edge of built-in appliances since that tile will never be visible. Deciding this before measuring can meaningfully change the total wall width used in the calculation, particularly in narrower kitchens where appliances take up a large share of the counter run.
Step 11: Budget grout and adhesive as separate line items
Grout and thin-set adhesive are priced and purchased separately from the tile itself, typically by the bag, with coverage depending on tile size, grout line width, and adhesive trowel size. A small backsplash project often needs only one bag of each, but it’s worth confirming coverage against the actual project square footage rather than assuming a single bag always covers any size job.
Step 12: Keep leftover tile for future repairs
Setting aside 5 to 10 percent of the total tile ordered as spare stock after installation makes it possible to repair a cracked or chipped tile years later without a color mismatch. Because tile lines are frequently discontinued or updated, sourcing a matching replacement long after the original installation is often difficult or impossible without this reserved stock.
Step 13: Compare tile price across a few suppliers before ordering
Backsplash tile pricing can vary meaningfully between big-box retailers, specialty tile shops, and online suppliers, particularly for designer or imported tile. Since price is multiplied across the full tile count, even a modest per-tile difference compounds into a noticeable total cost difference on a larger backsplash project.
Step 14: Confirm labor pricing separately if not doing it yourself
Backsplash installation labor is typically priced per square foot and depends heavily on tile size and pattern complexity, with intricate mosaic or herringbone layouts commanding higher labor rates than a straightforward subway tile grid. Getting a labor quote based on the actual tile size and pattern chosen, rather than a generic estimate, gives a more accurate total project cost.
Step 15: Recheck the calculation against the actual box coverage listed on the product
Before finalizing an order, compare the calculator’s estimated square footage against the coverage per box printed on the specific tile product’s packaging, since coverage can vary from the general reference numbers used in early planning. This final check against the actual product avoids over- or under-ordering by a box or two due to a coverage assumption that didn’t match the chosen tile exactly.
Step 16: Keep the receipt and tile information for future reference
Recording the tile brand, product name, color, and dye lot number alongside the purchase receipt makes any future repair or small addition far easier to source correctly. This small bit of record-keeping, done once at the time of purchase, saves considerable effort if a repair is needed months or years after the original backsplash installation.
Ordering rules that prevent running short mid-installation.
A calculator gives the best starting numbers, but the final order still depends on wall complexity, box coverage, and dye lot availability. The rules below cover the details worth checking before placing a tile order.
Calculate wall width times backsplash height for the base area, add 10 to 15 percent waste depending on outlets and corners, then round up to full boxes based on each box’s printed coverage.
Scale waste to wall complexity
A plain wall needs less waste than one with outlets, windows, or an inside corner cutting into the layout.
Order full boxes, not exact tiles
Round the final quantity up to the next full box, since most suppliers don’t sell partial boxes.
Match dye lots across boxes
Order all boxes from the same production lot to avoid visible color shifts across the finished wall.
Keep spare tile for repairs
Set aside 5 to 10 percent of the total order as leftover stock in case a tile needs replacing later.
Helpful kitchen renovation topics.
A backsplash rarely gets planned in isolation. Once you know your tile count, it helps to plan the surrounding elements at the same time — countertop and cabinet colors, kitchen island sizing, and overall flooring budget. Use these supporting pages from the HomeStyle Calculator homepage to plan the rest of the kitchen.
Six things tile installers always check before starting a job.
Dry-lay a row before committing
Laying tile out dry along the counter first reveals awkward cut widths at the ends before any adhesive goes down.
Center the layout on a focal point
Start the tile pattern centered on the range or sink rather than at a wall edge, so any narrow cut pieces end up in less visible corners.
Cut outlets before setting adjacent tile
Mark and cut outlet notches on a full tile before installation rather than trying to fit a pre-cut piece into place.
Match grout color to the tile edge
A grout color close to the tile creates a seamless look, while a contrasting grout emphasizes the individual tile pattern.
Seal natural stone before grouting
Porous stone tile should be sealed before grout is applied, or grout haze can stain the surface permanently.
Keep extra tile in original packaging
Store leftover boxes with their labels intact so the dye lot and product details are easy to find years later.
Backsplash questions — answered.
More calculators for every room decision.
Every tool uses professional designer and installer formulas. Free, instant, no sign-up — just enter your wall or room and get the exact answer.
Bookmark HomeStyle Calculator for every kitchen decision.
From backsplash tile to island sizing to paint, our free tools give you the exact quantity and cost before you order material or book an installer.