Find out Exactly How Much Wainscoting Material You Need.
Enter your wall width, choose a style and rail height, and get an instant panel, sheet or batten count plus rail linear footage — using the same layout math trim carpenters rely on. No more uneven panel spacing or a short trip back to the lumber yard.
Divide wall width by (panel width + stile width) for panel count, or by batten spacing for board-and-batten. Standard wainscoting height is 32–36 inches; rail linear footage equals roughly twice the wall width.
Typical material count by wall width and style.
These estimates assume one standard door opening, a 3 inch stile width, and a 14 inch panel or batten width. Use the calculator above for a total matched to your exact wall and style.
| Wall Width | Raised / Flat Panel | Beadboard (4 ft sheets) | Board & Batten (16 in spacing) | Notes |
|---|---|---|---|---|
| 8 ft | 5 panels | 2 sheets | 7 battens | Small accent wall |
| 10 ft | 6 panels | 3 sheets | 8 battens | Half bathroom |
| 12 ft | 7 panels | 3 sheets | 10 battens | Standard bedroom wall |
| 14 ft | 9 panels | 4 sheets | 11 battens | Full room, one door |
| 18 ft | 11 panels | 5 sheets | 14 battens | Dining room run |
| 24 ft | 15 panels | 6 sheets | 19 battens | Open-plan great room |
Four wainscoting styles — and the material logic behind each.
Style determines which formula applies. Here is what each one is built for and how its material count is calculated.
Raised Panel
A beveled, three-dimensional panel profile framed by stiles, giving a formal, traditional look. Needs the most machining and typically the highest cost per panel.
Panels = run ÷ (panel + stile)Flat Panel
A simple inset flat panel between stiles, using the same layout math as raised panel but with lower material and labor cost thanks to its simpler profile.
Panels = run ÷ (panel + stile)Beadboard
A continuous grooved-plank look sold in sheets, giving seamless coverage without individual framed panels. Fast to install across a long, uninterrupted run.
Sheets = run ÷ 4 ftBoard & Batten
Vertical strips spaced evenly over a painted or backed wall, creating a modern, simplified panel look. Batten count depends on chosen spacing, not panel width.
Battens = run ÷ spacing + 1See how material count changes by wall and style.
These steps cover the essentials: measuring the wall, choosing a style and rail height, and confirming panel or batten spacing before you order.
Measure the wall
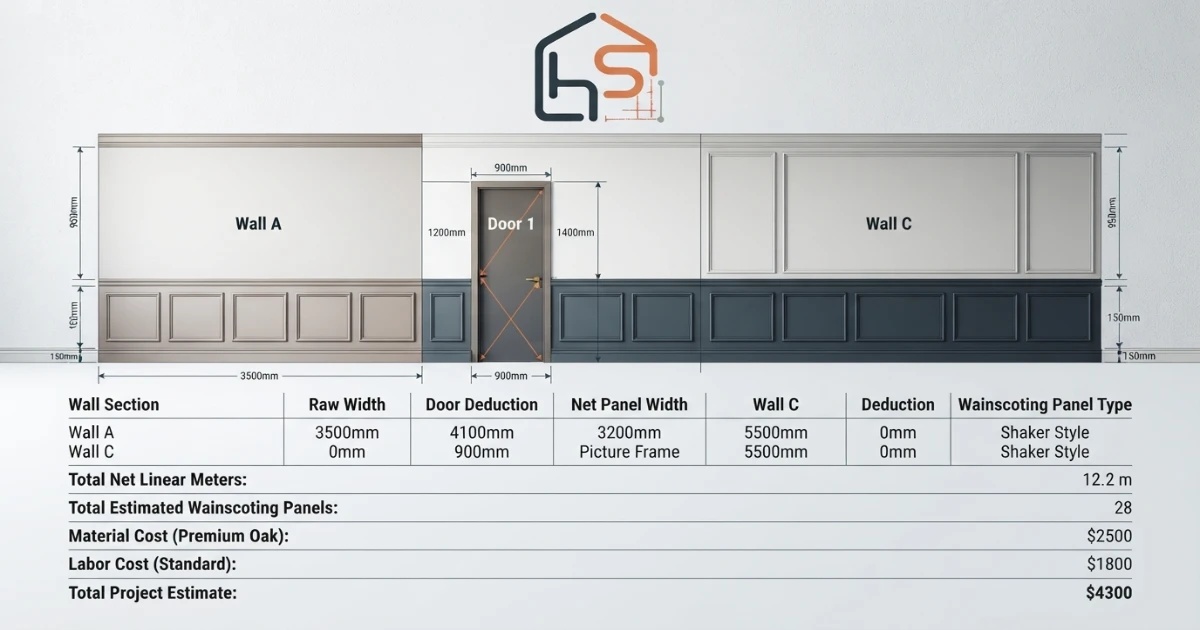
Start with total wall width and subtract door openings before choosing a style. Windows above rail height usually don’t need deducting.
Choose a style
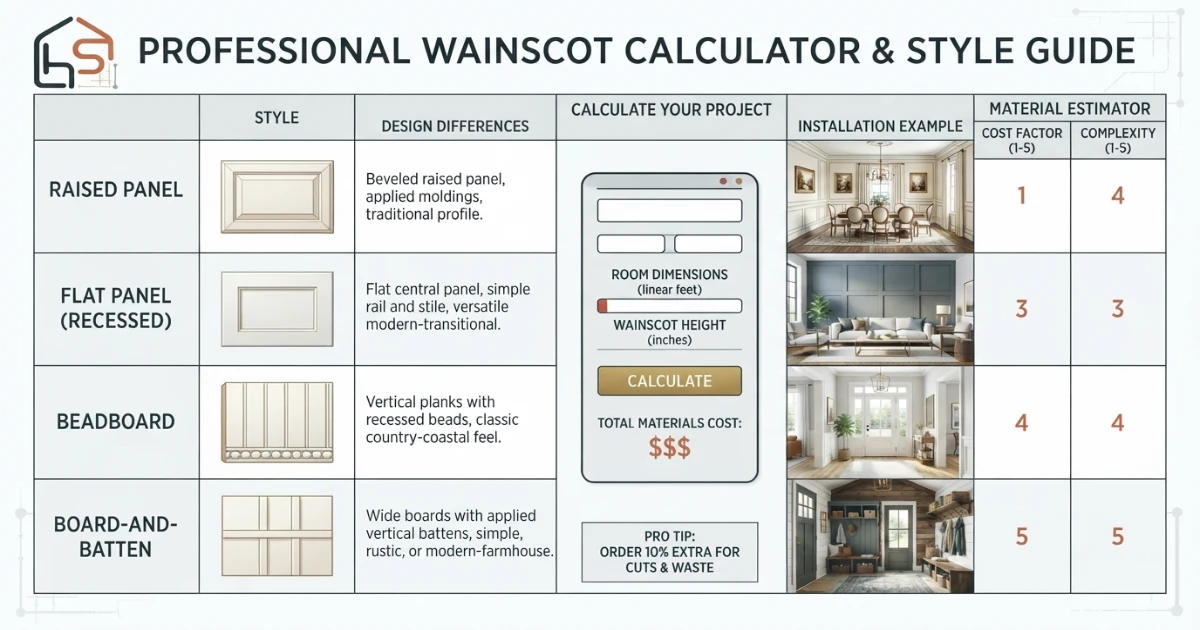
Panel styles use a panel-plus-stile formula, while beadboard and board-and-batten use sheet count or spacing instead.
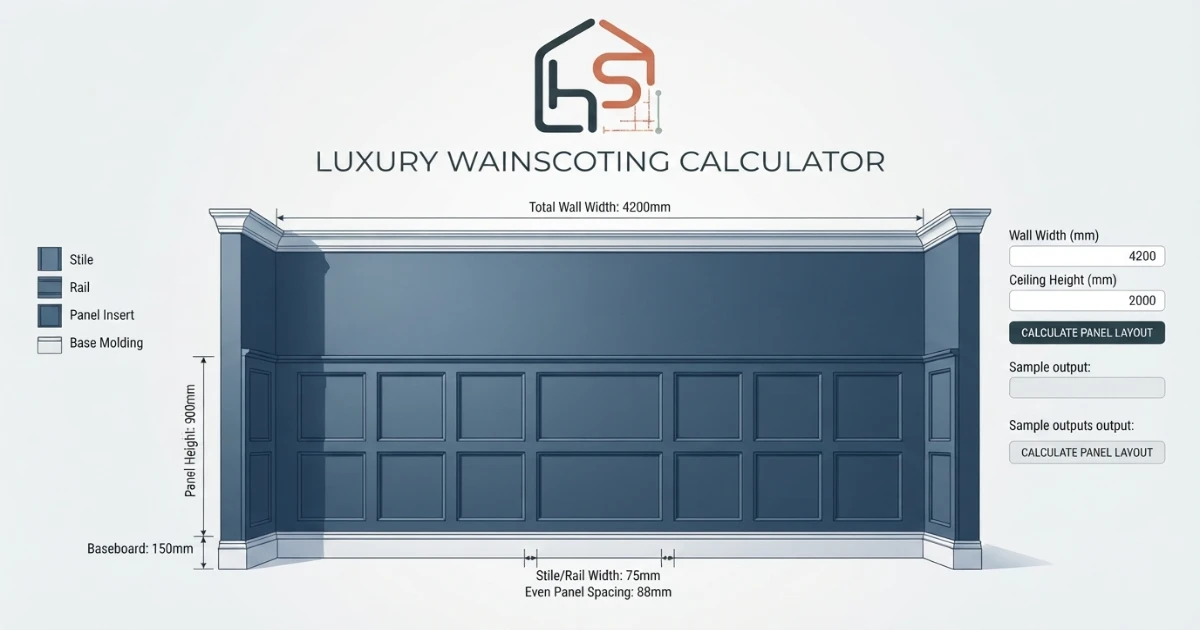
Confirm even spacing
Adjusting panel width slightly so it divides evenly into the wall run gives a more symmetrical, professional-looking result.
How to calculate wainscoting materials — the complete guide.
The most common wainscoting mistake is forcing a fixed panel width instead of adjusting it slightly to divide evenly into the wall run. A wall that doesn’t divide cleanly into whole panels ends with an oddly narrow panel at one end, which reads as an obvious afterthought rather than a planned layout.
Wainscoting is one of the more satisfying trim projects to plan on paper, since it follows a genuinely predictable layout formula rather than the more approximate estimating used for paint or fabric. That predictability is also exactly why small errors compound visibly: a panel width that doesn’t divide evenly into the wall, a stile width chosen without checking the total layout, or a rail height picked without considering the room’s ceiling height can all turn an otherwise well-executed installation into something that reads as slightly off. This guide walks through the full material and layout calculation so the numbers above match what a trim carpenter would actually cut and order.
Step 1: Measure the wall’s linear width
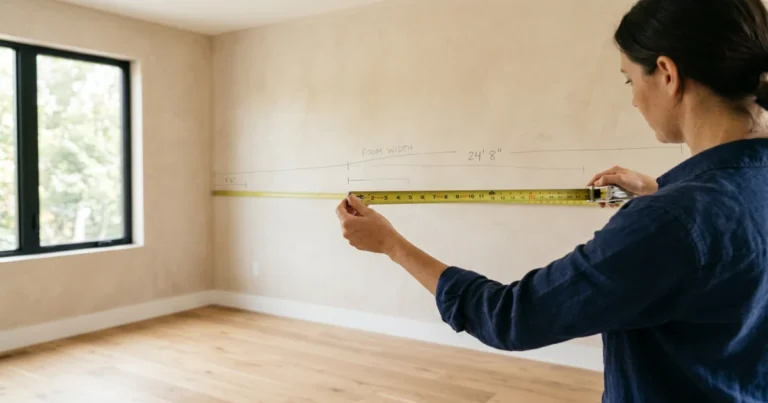
Measure the total width of the wall or wall run that will receive wainscoting, in a straight line. For a room with wainscoting running around multiple walls, measure each wall separately, since corners typically need their own dedicated stile or corner piece rather than a panel spanning the corner itself.
Step 2: Subtract door openings from the run
Doors interrupt the wall run and are typically subtracted from the total linear width before calculating panel or batten count, since wainscoting usually stops at the door casing on either side rather than running behind or through it. A standard interior door opening is roughly 32 to 36 inches wide including its casing; wider openings such as double doors should be measured directly rather than estimated.
Step 3: Decide whether windows affect the run
Windows with a sill above the chosen wainscoting height, which is the case for most standard 32 to 36 inch wainscoting under a typical window sill height of 30 or more inches, usually don’t need to be subtracted from the linear run, since the wainscoting simply continues beneath them uninterrupted. Low windows or window seats that dip below the wainscoting height are the exception and should be treated similarly to a door opening.
Step 4: Choose a rail height
Standard wainscoting height ranges from 32 to 36 inches, roughly one-third of a typical 8 to 9 foot wall, which is the most common choice for hallways, bathrooms and bedrooms. A taller 42 inch height is common in dining rooms and more formal spaces, creating a more substantial, elevated look, particularly under a chair rail or plate rail. Very tall wainscoting approaching half the wall height is sometimes used in libraries or studies for a more enclosed, paneled-room effect, though it needs proportionally taller stiles and more material overall.
Step 5: Choose a wainscoting style
Raised panel wainscoting uses a beveled, three-dimensional panel profile within a stile-and-rail frame, giving the most traditional, formal look and typically the highest material and machining cost. Flat panel wainscoting uses the same stile-and-rail framing but with a simple flat inset panel, offering a similar layout at a noticeably lower cost. Beadboard uses continuous grooved sheets rather than individually framed panels, giving a classic cottage look and generally the fastest installation for a long, uninterrupted wall. Board-and-batten uses evenly spaced vertical strips over a painted or backed wall surface, creating a simplified, more modern panel look without true framed panels at all.
Step 6: Calculate panel count for raised or flat panel styles
Divide the net wall run, after door deductions, by the sum of your desired panel width plus one stile width, then round to the nearest whole number for the panel count. Recalculate the actual panel width by working backward from that rounded panel count so the panels divide evenly into the exact wall run, since forcing a fixed panel width onto a wall that doesn’t divide evenly leaves an odd, narrow panel at one end that looks like an error rather than a design choice.
Step 7: Calculate stile count
Stile count is always one more than the panel count, since a stile sits at both ends of the run as well as between every pair of adjacent panels. A wall with 7 panels needs 8 stiles: one on each outer edge and one between each pair of panels in between.
Step 8: Calculate sheet count for beadboard
Beadboard is commonly sold in 4 foot wide by 8 foot tall sheets, which are typically cut down to the chosen wainscoting height rather than used at full sheet height. Divide the wall’s linear width in feet by 4 and round up to find the number of sheets needed, keeping in mind that any leftover material from height trimming often can’t be reused for width coverage on a different wall.
Step 9: Calculate batten count for board-and-batten
Divide the net wall run by your chosen batten spacing, then add one to account for the batten at the starting edge, similar to the stile-count logic used for framed panel styles. Common spacing ranges from 12 to 24 inches, with 16 inches being a popular default that often aligns conveniently with standard wall stud spacing for easier fastening.
Step 10: Calculate rail and cap trim footage
Most wainscoting installations include a cap rail along the top of the paneling and sometimes a base rail or shoe molding along the bottom, in addition to any baseboard already present. As a simple estimate, rail and cap footage totals roughly twice the wall’s linear width, covering both the top cap and a bottom rail component, though exact profiles and whether a separate baseboard is being replaced can shift this figure somewhat.
Step 11: Convert material counts into a cost estimate
Multiply panel, sheet or batten count by the price per unit for your chosen material and style, then add the rail and trim footage multiplied by its price per linear foot. Framed panel styles, particularly raised panel, generally carry the highest per-unit material cost due to the additional machining involved, while board-and-batten tends to be the most economical since it uses simple dimensional lumber strips rather than milled panels.
Step 12: Plan for a backing surface where needed
Board-and-batten and some flat panel installations are applied over a painted wall, an MDF backer sheet, or beadboard itself as a backing layer rather than directly over bare drywall. If a backing material is part of the plan, calculate its area separately, in square feet, using the wall’s width and the chosen wainscoting height, and add that material cost to the batten or panel total.
Step 13: Order slightly more than the bare calculated minimum
Add one or two extra stiles, battens, or a partial sheet beyond the exact calculated count to cover cutting mistakes, damaged pieces, or a design change discovered partway through installation. This is a relatively small additional cost compared with a second delivery or a mismatched batch ordered later, particularly for stained or specially finished material where exact color matching between orders is difficult.
Wainscoting material types: MDF, solid wood and PVC
- MDF (medium-density fiberboard) — the most common and economical choice for painted wainscoting, smooth and consistent, though it needs to stay dry and is typically not left unpainted.
- Solid wood — suits stained or natural-finish wainscoting where wood grain is meant to show, at a higher material cost than MDF and with more attention needed to seasonal expansion and contraction.
- PVC or moisture-resistant composite — a strong choice for bathrooms, mudrooms and other high-moisture areas where MDF would be prone to swelling or damage over time.
Wainscoting rules that prevent an uneven, awkward layout.
A calculator gives the best starting numbers, but the final layout still depends on how panel width, stile spacing and corners work together on the actual wall. The rules below cover the details worth checking even after settling on a material count from the calculator above.
Calculate panel or batten count first, then adjust the exact panel width slightly so it divides evenly into the net wall run rather than forcing a fixed width and living with an odd leftover panel at one end.
Adjust panel width to fit evenly
Round panel count to a whole number first, then recalculate exact panel width so the layout divides evenly into the wall run.
Plan corners before ordering
Inside and outside corners typically need a dedicated stile or corner trim piece rather than a panel spanning the corner itself.
Match rail height to ceiling height
Taller ceilings can support taller wainscoting proportionally; a height that suits an 8 foot ceiling can look undersized under a 10 foot one.
Confirm backing material needs
Board-and-batten and some flat panel styles need a backing surface calculated and ordered separately from the batten or panel count.
Helpful room planning topics.
Wainscoting rarely stands alone in a room’s design. Once you know your material count, it helps to plan the surrounding elements at the same time — wall color above the rail, room layout around the newly trimmed wall, and lighting to highlight the added dimension. Use these supporting pages from the HomeStyle Calculator homepage to plan the rest of the room.
Six things trim carpenters always check before installing wainscoting.
Dry-fit the layout before cutting
Lay out stiles or battens with painter’s tape on the wall first to confirm spacing looks right before making a single permanent cut.
Center the layout on the focal wall
On a wall with a fireplace or other focal point, center the panel or batten layout on that feature rather than starting blindly from one corner.
Check wall flatness before installing
Uneven or bowed walls can telegraph through thin panel material. A skim coat or shimming may be needed before wainscoting goes up.
Caulk before painting, not after
Caulking every seam and nail hole before the final paint coat gives a seamless, factory-built look rather than visible gaps.
Match cap rail profile to room style
A simple, flat cap rail suits modern rooms, while a more ornate, curved profile suits traditional and historic-style interiors.
Order a little extra for future repairs
A leftover panel, batten or partial sheet makes future repairs from dents or water damage far easier to match than reordering later.
Wainscoting calculation questions — answered.
More calculators for every room decision.
Every tool uses professional designer formulas. Free, instant, no sign-up — just enter your room and get the exact answer.
Bookmark HomeStyle Calculator for every room in the house.
From a small powder room accent wall to a full dining room, our free tools give you the exact panel, sheet or batten count before you order.