Know the Exact Pieces Before you Cut a Single Miter.
Enter your room dimensions, corner count and molding stick length, and get an instant perimeter, pieces-needed and total cost — including the waste allowance every corner miter actually eats up. No more running short one stick from finishing the room.
Add up the room’s full perimeter, subtract any open archways, add 10 to 20 percent waste depending on corner count and profile, then divide by the molding stick length — 8, 12, or 16 feet — to get the number of pieces to buy.
Typical pieces and cost by room shape and size.
These estimates assume standard 12-foot molding sticks and mid-range paint-grade material. Use the calculator above for a cost matched to your exact room and profile.
| Room Shape | Typical Size | Corners | Pieces Needed | Notes |
|---|---|---|---|---|
| Small rectangular room | 10×12 ft | 4 | 4–5 pieces | Least waste, fewest seams |
| Standard rectangular room | 14×16 ft | 4 | 5–7 pieces | Most common living room size |
| L-shaped living/dining | 18×20 ft (L) | 6 | 8–10 pieces | Extra corner adds waste |
| U-shaped great room | 20×24 ft (U) | 8 | 11–14 pieces | Budget the highest waste tier |
| Room with open archway | 14×16 ft, 6 ft opening | 4 | 4–6 pieces | Subtract archway from perimeter |
| Large open floor plan | 24×30 ft | 4–6 | 15–19 pieces | Order in one batch to match stain |
Four room shapes — and how each changes your waste.
Every corner in a room needs a miter or coped cut, and every cut trims away a bit of usable molding. Here is what each room shape means for corner count and waste.
Rectangular
A standard four-wall room with 4 inside corners, needing the fewest miter cuts and the lowest waste allowance of any layout.
Corners: 4 · Waste: 10%L-Shaped
A room with one jog, such as a combined living and dining area, adding 2 extra corners beyond a simple rectangle.
Corners: 6 · Waste: 12%U-Shaped
A great room or open floor plan with two jogs, common in larger open-concept homes, needing the most miter cuts.
Corners: 8 · Waste: 15%Custom / Irregular
An angled, curved, or otherwise irregular room that needs its corners counted individually rather than assumed.
Corners: Varies · Waste: 10%+See how perimeter and corner count change your total.
These steps cover the essentials: measuring the perimeter, applying the right waste allowance for the corner count, and confirming the piece count before you cut.
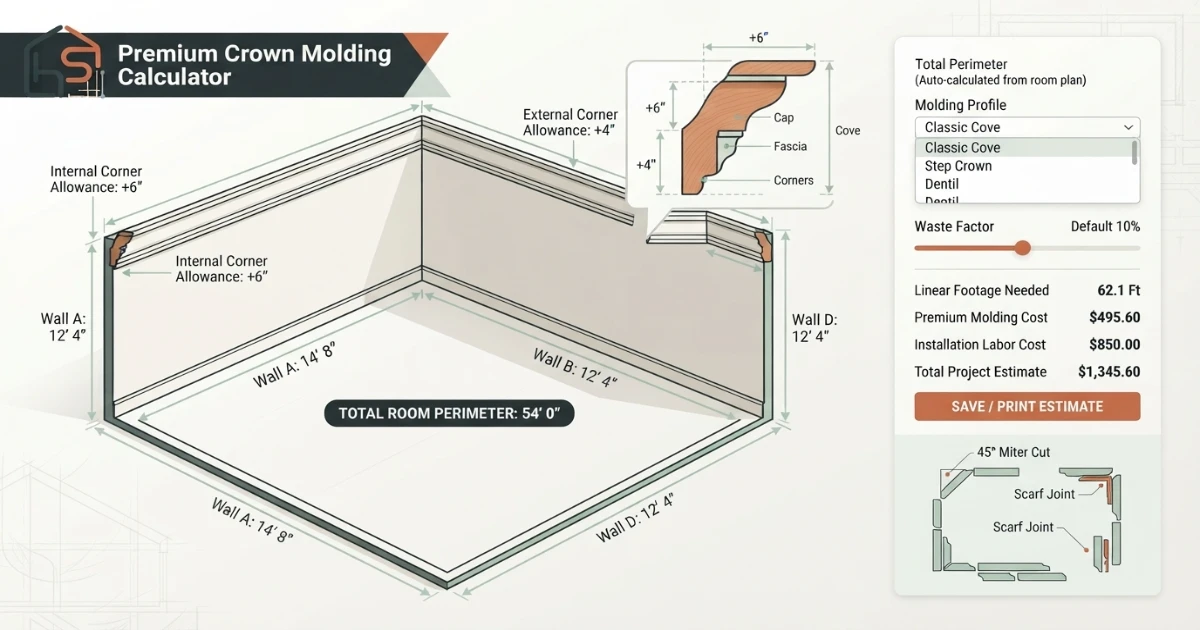
Measure the perimeter
Add up every wall length that will receive molding, and subtract any open archways.
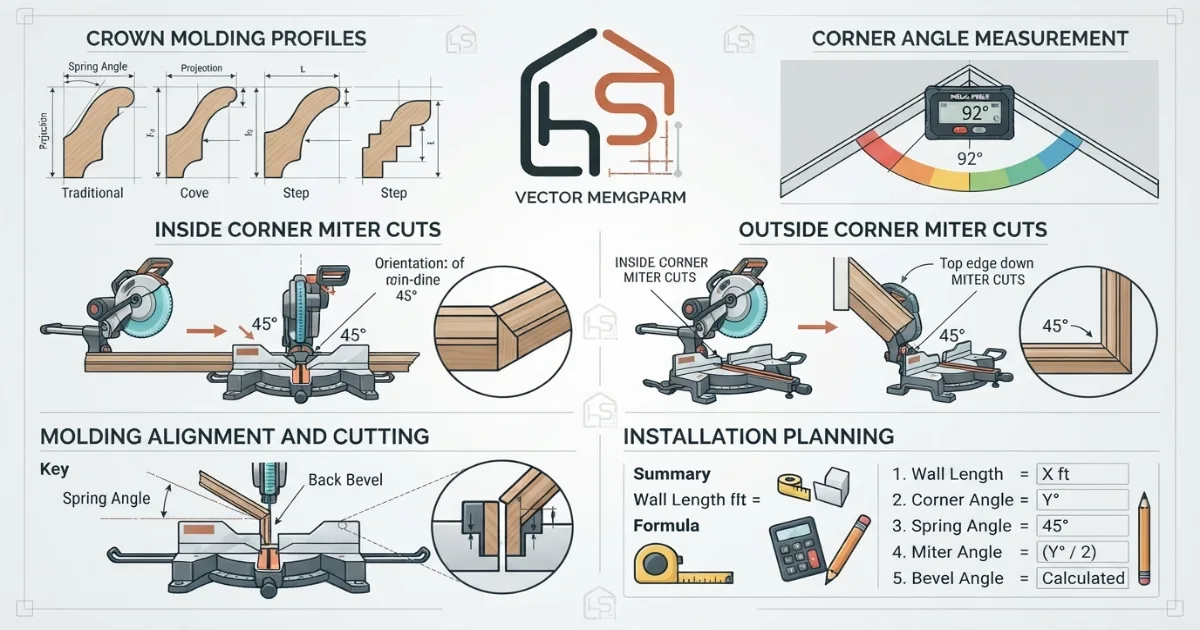
Apply the right waste allowance
More corners and ornate profiles both increase how much material gets trimmed away at each cut.
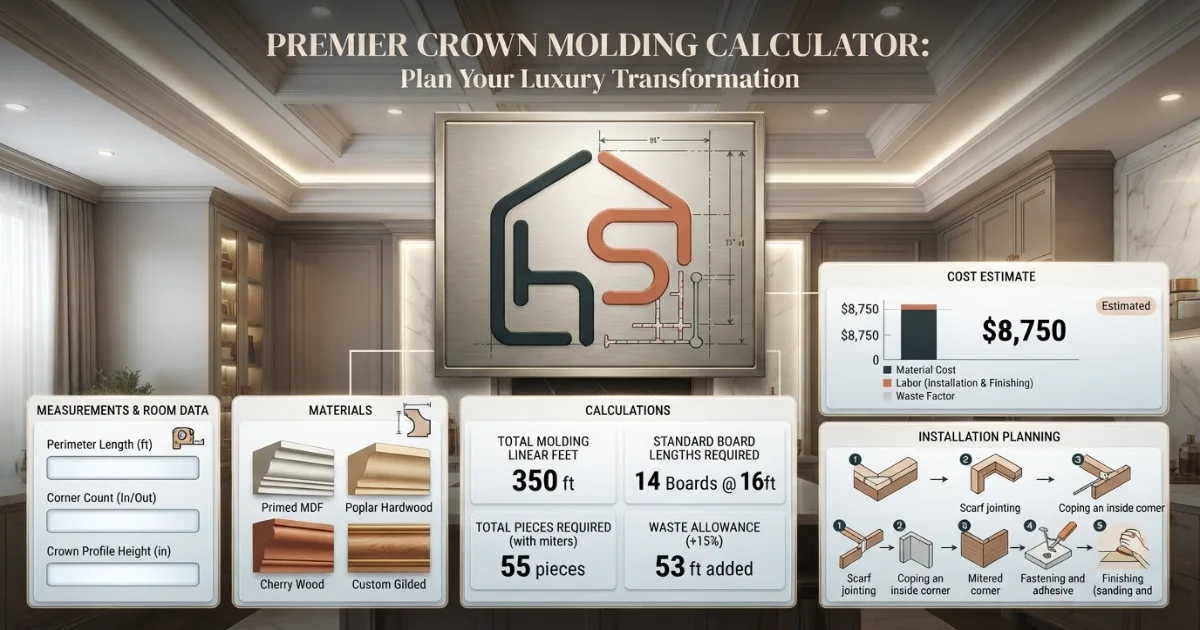
Confirm the piece count
Round up to a full stick and add one buffer piece so a mis-cut angle never derails the install.
How to calculate crown molding — the complete guide.
The most common crown molding budgeting mistake is ordering exactly the room’s perimeter in linear footage, without any waste allowance for miter cuts. Every 45-degree corner cut trims material off both pieces meeting at that joint, and a wrongly cut angle means recutting from a fresh piece, which is exactly the gap that leaves an installer short one stick partway through the room.
Step 1: Measure the room’s full perimeter
Walk the room and measure the length of every wall that will receive crown molding, then add all of those measurements together to get the total perimeter. Measure at the ceiling line itself rather than at floor level, since a room with an offset wall, a bump-out, or an angled section can have a slightly different perimeter at the ceiling than at the floor.
Step 2: Identify and subtract any open archways
If a wall has an open archway or a doorless opening leading into another room, with no ceiling line to trim across that gap, subtract that opening’s width from the total perimeter. A standard door or window doesn’t need to be subtracted, since crown molding runs above them at the ceiling line regardless of what’s below, but a true open archway breaks the continuous run of molding entirely.
Step 3: Count the room’s corners accurately
A simple rectangular room has 4 inside corners, but an L-shaped room created by a jog in the wall has 6 corners, and a U-shaped or more complex room with two jogs can have 8 or more. Walk the room’s perimeter and count every direction change, including any outside corners where the wall turns away from the room’s interior, since those need their own miter cut just like an inside corner.
Step 4: Understand why corner count drives waste
Every corner, whether cut with a miter saw at an angle or shaped with a coping saw to fit the adjoining profile, requires trimming material off the end of at least one piece meeting at that joint. A room with more corners has proportionally more of these cuts relative to its total perimeter, which is why an L-shaped or U-shaped room needs a higher percentage waste allowance than a simple rectangle of the same total footage.
Step 5: Choose a molding stick length based on wall length
Crown molding is most commonly sold in 8-foot, 12-foot, and 16-foot lengths. Longer sticks mean fewer seams along a long wall, which is both a cleaner look and less waste from trimming multiple shorter pieces to fit, but longer sticks are also heavier, harder to transport, and require more room to maneuver during installation, especially around stairwells or through doorways.
Step 6: Apply the base waste percentage for the room shape
As a general guideline, budget 10 percent extra for a simple rectangular room, 12 to 15 percent for an L-shaped room, and 15 to 20 percent for a U-shaped or more complex layout. This waste allowance accounts for the miter cuts at every corner, plus a reasonable buffer for a miscut angle needing to be recut from a fresh section.
Step 7: Add extra waste for an ornate or high-profile molding
A simple, low-profile molding wastes relatively little material at each cut, but a tall, multi-step, or ornately carved profile can waste significantly more per corner, since the cut has to be precise across a more complex cross-section. Add another 5 to 10 percent on top of the shape-based waste allowance for any molding profile taller than about 5 inches or with a heavily detailed face.
Step 8: Calculate the total linear footage needed
Add the net perimeter from step 2 and multiply it by one plus the total waste percentage from steps 6 and 7 combined. This final number is the total linear footage of crown molding the project actually requires, before it gets converted into a number of individual sticks to purchase.
Step 9: Convert total footage into a piece count
Divide the total linear footage needed by the chosen molding stick length, and always round up to the next whole piece, since suppliers sell full sticks only and running short mid-installation risks a stain or finish mismatch on a reorder. Many installers also recommend keeping one extra piece on hand specifically for a miscut corner or a future repair.
Step 10: Understand mitered versus coped corners
A mitered corner cuts both pieces meeting at the joint at an angle, typically 45 degrees for a standard 90-degree wall corner, so the two cut edges meet in a clean seam. A coped corner instead cuts one piece flat against the wall and shapes the other piece’s end to follow the first piece’s profile exactly, which often creates a tighter, less gap-prone joint, especially on inside corners where minor wall or ceiling irregularities are common.
Step 11: Budget more waste for outside corners than inside corners
An outside corner, where the wall turns away from the room rather than into it, is generally more visible and less forgiving of a small gap or misalignment than an inside corner. Outside miters are also more likely to need a second cut attempt to get the angle exactly right, so a room with several outside corners, such as a bump-out or an alcove, deserves a slightly higher waste allowance than one with only inside corners.
Step 12: Consider corner blocks as a mitering alternative
Pre-formed corner blocks let each length of molding butt into a flat, pre-shaped corner piece instead of requiring a precisely angled miter or coped cut. This speeds up installation considerably and reduces waste from miscut angles, though it does change the corner’s visual style slightly and adds a small per-corner material cost of its own.
Step 13: Price the molding material
Basic MDF or paint-grade crown molding typically costs $1 to $4 per linear foot, mid-range polyurethane or finger-jointed wood runs $3 to $8 per linear foot, and solid hardwood or ornate multi-piece profiles can run $10 to $25 or more per linear foot. Multiply the total footage from step 9 by the price per linear foot, or the piece count by the price per stick, to get the material total.
Step 14: Factor in professional installation labor
Professional installation typically adds $3 to $12 per linear foot on top of material cost, depending on ceiling height, molding profile complexity, and whether the walls and ceiling are square or need extra shimming to get a tight fit. High ceilings, vaulted sections, and rooms with many corners generally sit at the higher end of that labor range.
Step 15: Plan for painting or finishing separately
Paint-grade molding needs to be caulked, primed, and painted after installation, which is often quoted as a separate line item from installation labor, typically adding another $1 to $3 per linear foot depending on the number of coats and whether the ceiling color also needs touching up. Pre-finished or stained wood molding skips most of this cost but is generally pricier as raw material to begin with.
Step 16: Order everything in one batch before cutting
Wood and MDF molding can vary slightly in shade or finish between production runs, so order the full piece count, including any buffer, in a single purchase rather than reordering partway through if a miscut runs the count short. Confirming the full order upfront also avoids a delay waiting on a reorder to match the same batch.
Rules that prevent running short mid-installation.
A calculator gives the best starting numbers, but the final order still depends on the exact corner angles, ceiling squareness, and the chosen profile’s cut complexity. The rules below cover the details worth checking even after settling on a piece count.
Calculate the net perimeter, add 10 to 20 percent waste depending on corner count and profile complexity, divide by the molding stick length, round up to a full piece, and order one extra piece for miscut corners or future repairs.
Corner count comes first
Count every inside and outside corner accurately before estimating waste, since each one adds a cut that trims usable material.
Round up, never down
Always round the final piece count up to the next whole stick, since suppliers sell full lengths only and a shortfall risks a finish mismatch.
Buy the buffer piece upfront
Order one extra piece from the same batch at the time of the initial purchase, specifically reserved for a miscut corner or future repair.
Separate material and labor
Price molding by the linear foot and labor by the linear foot separately, rather than combining them into one blended per-piece estimate.
Helpful room and finishing topics.
A crown molding budget rarely comes together from piece count alone. Once you know the total, it helps to plan the surrounding elements at the same time — ceiling paint color, wall trim, and the room’s overall layout. Use these supporting pages from the HomeStyle Calculator homepage to plan the rest of the room.
Six things installers always check before cutting.
Test-fit a scrap piece first
Cut a short test miter from a scrap length and check it against the actual corner before cutting into a full-length piece.
Order all molding from one batch
Buy the full piece count, including any buffer, in a single order to avoid subtle color or finish differences between sticks.
Check that corners are actually square
Many corners aren’t a perfect 90 degrees, so measure the actual angle before assuming a standard 45-degree miter will fit cleanly.
Consider coping inside corners
A coped inside corner often hides minor wall irregularities better than a mitered one, especially in an older home with settled framing.
Get labor quoted per linear foot
Ask an installer to quote labor per linear foot rather than a flat room rate, so it’s easy to compare against a different molding profile.
Don’t skip the buffer piece
A single miscut corner discovered mid-install is far cheaper to fix with a buffer piece on hand than with an emergency reorder.
Crown molding questions — answered.
More calculators for every room decision.
Every tool uses professional designer formulas. Free, instant, no sign-up — just enter your room and get the exact answer.
Bookmark HomeStyle Calculator for every room in the house.
From a single rectangular bedroom to a U-shaped open floor plan, our free tools give you the exact piece count, waste allowance and total cost before you cut.