Curtain rod length: how far past the window?
Use this curtain rod length guide to choose the extension on each side, calculate the usable pole span, add finials and connect the result with curtain fullness and panel count.
Written and reviewed by Rehana K · HomeStyle Calculator measurement-first method.
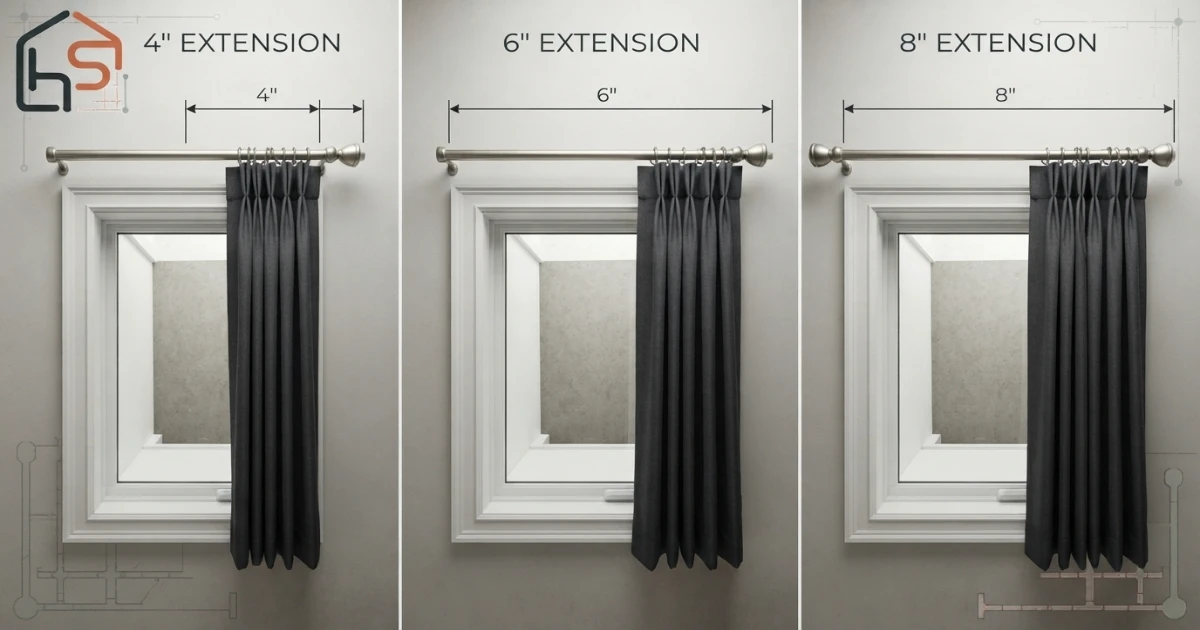
Extend the rod about 4–8 inches past each side of the frame.
Six inches per side is a reliable starting point for many windows. Use four inches where wall space is tight, eight inches for stronger stack-back, and ten to twelve inches for large windows or bulky curtains when the wall and hardware allow it.
Calculate the usable rod span from the window frame and side extensions. Add finial projection afterward to confirm the complete tip-to-tip wall width.
Use the right HomeStyle Calculator page for each measurement
Set the horizontal rod span, then connect it with mounting height, finished length, fullness and panel quantity.
Rod extension from first measurement to final installation
Curtain rod length, finial and panel calculator
Enter the frame width, side extension, finial projection, fullness and panel details. The calculator returns usable rod span, tip-to-tip width, fabric target, balanced panel count and package quantity.
Your rod-length result
See how side extension changes the rod and open curtain stack
Select a starting extension. The window stays the same size while the usable rod span and stack-back zone expand.
Finials are added separately to the tip-to-tip wall width.
Curtain rod length formula: frame width plus both side extensions
The usable curtain rod span equals the outside window-frame width plus the extension on the left and right. When both sides use the same extension, the formula is frame width + (extension × 2). Add both finials separately to estimate the complete tip-to-tip wall space.
For a 60-inch frame with a 6-inch extension on each side, the usable rod span is 72 inches. If each finial projects 3 inches beyond the usable pole, the total tip-to-tip dimension is about 78 inches. The working span controls curtain coverage; the tip-to-tip dimension controls whether the hardware physically fits the wall.
This curtain rod length guide treats the outside edges of the frame as the measurement reference. Measuring only the glass can underestimate the installed span, especially when thick trim or grouped windows increase the real opening width.
Fast calculation
Window frame width + left extension + right extension = usable rod span. Usable span + both finials = total wall width required.
Measure the outside window frame—not only the glass
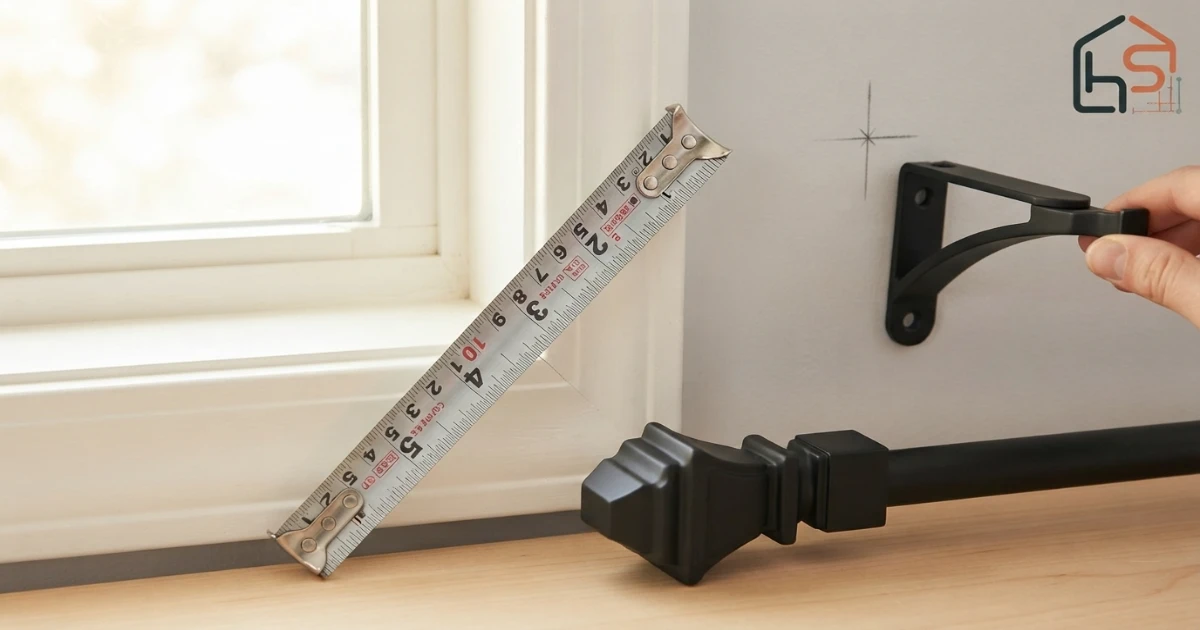
Place the tape at the outer left edge of the trim and measure to the outer right edge. If the window has no visible trim, measure the finished opening. Record the glass width separately only when it is useful for light-control planning; do not substitute it for the frame measurement in the rod calculation.
Check the width at the top and bottom when the opening appears uneven. The rod will normally be installed level, so use the planned bracket line as the horizontal reference. Note crown molding returns, cabinets, corner walls, light switches and vents that may reduce the available extension.
The complete Measure Window for Curtains guide covers frame width, return depth, grouped openings, floor measurements and obstacle mapping. Record the vertical position in How High to Hang Curtains before drilling because bracket height and side extension should be planned together.
How far past the window should a curtain rod extend?
A range of 4 to 8 inches beyond each side works for many residential windows. Four inches is compact, six inches is a balanced default and eight inches creates more room for the open curtain stack. Ten to twelve inches can work on large windows when thick fabric, deep pleats or wide panels need generous stack-back.
These ranges are starting points rather than universal rules. The best result depends on the curtain width, fabric weight, header, finials, bracket position and the clear wall beside the window. A beautiful wide rod is not useful if a finial collides with a corner or the folded panels block a doorway.
| Extension each side | Best starting use | Main advantage | Main caution |
|---|---|---|---|
| 4 in | Limited wall space or light panels | Compact footprint | More glass may remain covered |
| 6 in | Many standard windows | Balanced appearance and stack-back | Check finials and nearby switches |
| 8 in | Lined, wider or fuller curtains | Opens more of the glass | Needs extra wall and stronger hardware |
| 10–12 in | Large windows and bulky stacks | Generous reveal when open | May require a longer rod and center support |
When a 4-inch extension per side makes sense
A four-inch extension is useful when a window sits close to a corner, cabinet, wardrobe or adjoining wall. It creates some stack-back without forcing the hardware into a restricted area. Light curtains, narrow panels and treatments that remain mostly closed can perform well with this compact range.
The trade-off is reduced glass exposure when the curtains are open. Thick grommet panels or lined curtains may occupy most of the four-inch zone and still overlap the frame. Mark the expected stack with folded fabric or painter’s tape before choosing the rod.
When both sides do not have equal wall space, preserve the most balanced appearance possible and consider a one-way draw. Do not place a bracket so close to the frame that the curtain cannot pass it or the finial cannot be removed for panel installation.
Why 6 inches per side is a strong everyday starting point
Six inches beyond each side provides twelve inches of additional rod span beyond the frame. It usually gives standard panels enough room to begin stacking outside the glass while keeping the hardware proportionate to an ordinary bedroom or living-room window.
For a 48-inch frame, six inches per side produces a 60-inch usable rod span. For a 72-inch frame, the result is 84 inches. Use the Curtain Size Calculator to connect that rod span with fullness, finished panel width and package quantity.
Six inches is not automatically enough for every header. Large grommets, thick blackout lining and deep pinch pleats create a wider folded stack. Increase the extension when the wall and rod range support it, or use a lower-bulk header when the window is close to an obstacle.
Use an 8-inch extension for stronger stack-back
Eight inches per side is a practical upgrade for wider windows, lined panels and curtains that should reveal more glass when open. It visually broadens the window and gives the fabric a clearer parking zone outside the frame.
The extra span increases the total curtain width required. A 72-inch frame with eight inches per side creates an 88-inch rod. At 2x fullness, the treatment target becomes 176 inches of finished curtain width. Calculate the fabric separately in How Wide Should Curtains Be.
Check bracket spacing and rod diameter. Longer spans are more sensitive to flexing, particularly with heavy fabric. Follow the rod manufacturer’s support instructions and do not assume that a decorative telescoping pole can carry the same weight at every extension.
When 10 to 12 inches past each side is appropriate
A generous ten- to twelve-inch extension can suit large picture windows, tall formal rooms, thick interlined curtains and wide wall sections where the treatment is intended to frame the glass rather than cover it when open.
This range can make the window appear wider and preserve daylight, but it requires a substantial rod and enough clear wall for the fabric stack, brackets and finials. The overall tip-to-tip dimension may be twenty-six to thirty inches wider than the frame after finials are included.
Use painter’s tape to mark the complete rod and finials. View the line from the room entrance and main seating position. Coordinate nearby furniture with the Sofa Size Calculator or Bedroom Layout Planner so the open curtain stack is not trapped behind a headboard, sofa or cabinet.
Stack-back determines how much extension you really need
Stack-back is the width occupied by the folded curtain when it is open. It depends on total fabric width, header style, lining, panel count and how tightly the folds compress. A rod extension creates a parking area for this folded fabric outside the window frame.
Light sheers compress into a relatively small stack, while velvet, interlining and blackout layers create more bulk. Grommets form broad waves and can consume more horizontal space than small rings or a compact track. A rich fullness ratio also increases stack-back.
There is no single stack-back percentage that works for every curtain. Mock up one panel on a temporary rod when the wall is tight. The rod-length calculator gives the hardware span, while the fullness guide calculates the amount of fabric that must fit on that span.
Finials change the total wall width but not the usable curtain span
Finials sit beyond the usable pole and can add several inches to each end. Record the manufacturer’s finial projection or measure from the rod end to the outer tip. A 72-inch working rod with 3-inch finials needs approximately 78 inches of clear wall from tip to tip.
Do not include decorative finials in the width used for fullness calculations because curtains cannot hang over the finial. Use the pole span between the finial shoulders for fabric coverage and use the complete tip-to-tip number for wall clearance.
Large glass, crystal or sculptural finials can collide with corners, cabinet doors and artwork. When space is tight, choose a compact cap finial or a track without projecting ends rather than shortening the useful rod span too aggressively.
Place brackets so the rod span remains usable
Side brackets should normally sit outside the frame and inside the finials. Their exact inset depends on the hardware design. The curtain must be able to travel or stack without being trapped by a bracket, and the bracket screw plate must land on suitable structure or approved anchors.
Mark both bracket centers with a level. Measure the usable pole distance after accounting for any bracket stops, wraparound returns or telescoping overlap. Product-advertised rod length may refer to the adjustable pole range rather than the clear span available to the curtains.
A center bracket can interrupt a one-way draw unless the rings or carriers can pass it. For center-opening curtains, a fixed center support is usually compatible because the left and right panel groups stop at the middle.
Long rods and heavy curtains may need center support
As rod span and curtain weight increase, flexing becomes more likely. A center support, additional bracket or stronger track can keep the pole level. Follow the hardware’s listed span and weight instructions rather than relying on a universal cutoff.
The fully extended position of a telescoping rod is often less rigid than the shorter position. Heavy blackout panels, interlining and wide grommet curtains add load. Wall construction and anchor quality matter as much as the advertised rod diameter.
Plan support before ordering panels. A center bracket affects how curtains open and close, while a ceiling track may provide multiple fixing points across a very wide opening. Mark the intended draw direction before drilling.
Rod length and curtain fullness must be calculated together
The rod establishes the width the curtains must cover. Multiply the usable rod span by the chosen fullness ratio to calculate the target fabric width. A 72-inch rod at 2x fullness needs about 144 inches of combined finished panel width.
Do not multiply the tip-to-tip finial width. Use only the working pole span. Divide the target by the finished width of one panel, then choose the closest practical panel count. A center-opening arrangement needs balanced fabric on both sides, but it should not be forced into extreme over-fullness simply to create an even count.
Use How Wide Should Curtains Be for the detailed ratio guide and the full calculator for width, length and panel quantity in one plan.
| Usable rod span | Fullness ratio | Fabric target | Example 52-in panels | Achieved fullness |
|---|---|---|---|---|
| 60 in | 2x | 120 in | 2 panels = 104 in | 1.73x; consider wider panels |
| 72 in | 2x | 144 in | 3 panels = 156 in | 2.17x one-way, or balanced pair options |
| 84 in | 2x | 168 in | 4 panels = 208 in | 2.48x; fuller result |
| 96 in | 2x | 192 in | 4 panels = 208 in | 2.17x |
| 120 in | 2.5x | 300 in | 6 panels = 312 in | 2.60x |
Curtain rod extension by room and window type
Living rooms often benefit from six to eight inches per side because the curtains are opened frequently and the glass should remain visible. Coordinate the rod with seating, side tables and wall art. The Wall Art Size Calculator can help balance nearby artwork after the rod line is marked.
Bedrooms commonly use six inches per side, with more extension for thick blackout panels when clear wall space allows. Check nightstands, headboards, radiators and wardrobes. Dining rooms need enough extension to protect the curtain stack from chair movement and sideboards; use the Dining Table Size Calculator when the window sits near a circulation route.
Small kitchens and bathrooms may need compact rods because counters, tile returns, mirrors or cabinets limit the wall. Use a treatment that remains clear of heat and moisture rather than forcing a full-length curtain into an unsuitable opening.
| Room or opening | Starting extension | Why | Clearance check |
|---|---|---|---|
| Living room | 6–8 in per side | Reveal glass and frame the wall | Sofa, art and switches |
| Bedroom | 6–8 in per side | Support lined or blackout panels | Bed, nightstands and heater |
| Dining room | 6–10 in per side | Decorative stack-back | Chair route and sideboard |
| Kitchen/bath | 4–6 in per side | Limited wall and moisture zones | Cabinets, tile and fixtures |
| Sliding door | 8–16+ in where possible | Move stack away from active glass | Handle, doorway and wall return |
Curtain rod length for sliding and French doors
Measure the complete outside door frame and the clear wall on both sides. The rod or track should extend far enough for the open curtains to move away from the active panel, handle and walking path. A one-way draw can be more practical when most of the clear wall exists on one side.
Door curtains are usually heavier and wider than ordinary window panels, so the stack can be substantial. Mark the expected stack zone on the wall and floor. Do not let a finial project into the doorway or place a bracket where it blocks the panel travel.
Calculate the complete width and panel count in the Curtain Size Calculator. Select the floor finish in the Curtain Length Guide so the fabric remains clear of the track, moisture and foot traffic.
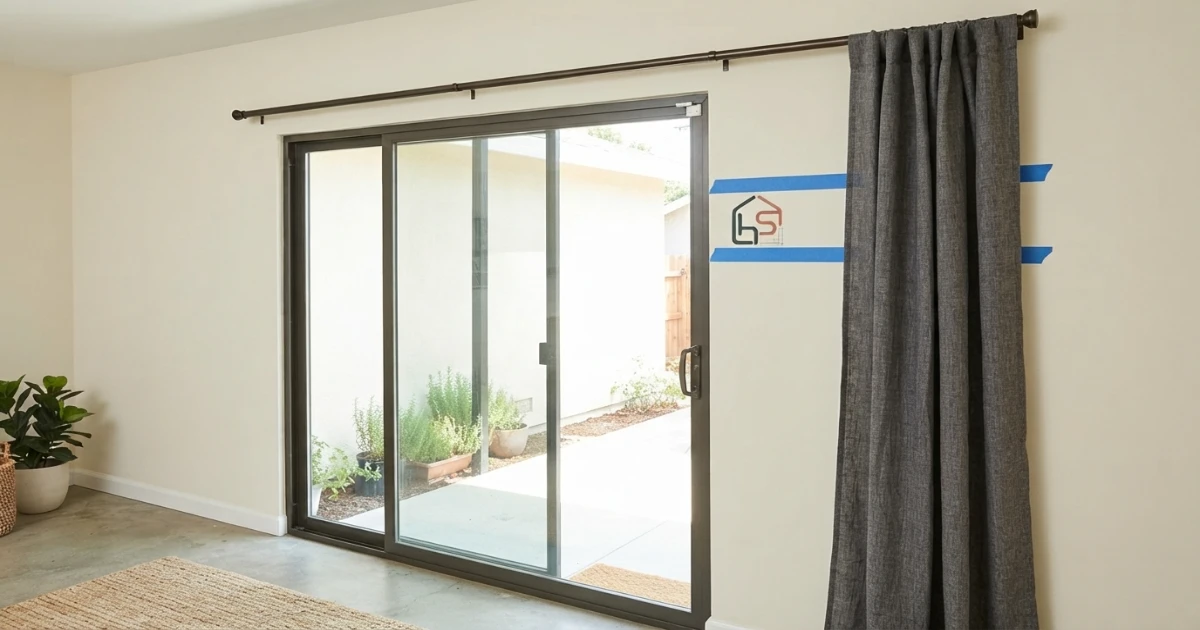
Bay windows, corner windows and grouped openings
Bay windows may use separate rods, angled connectors or a custom track. Measure every wall segment and corner angle independently. A straight curtain rod length formula does not describe the complete path when the hardware turns through a bay.
Corner windows need enough space for two curtain stacks without crowding the corner. Passing brackets or continuous tracks can help the fabric travel, but product-specific carrier and bend limits must be followed.
Grouped windows can use one long rod when the wall, supports and visual design allow it. Measure the complete outside frame group, add the desired outer extensions and decide whether the curtains should expose the mullions or treat the group as one opening.
Blackout curtain rods need side coverage and returns
Blackout performance improves when the rod extends beyond the frame and the curtain returns toward the wall. A wraparound rod, French return or side channel can reduce light leaking from the edges. The rod should also sit high enough to cover the top of the frame.
Adding more width helps the panels overlap and maintain folds, but excessive fullness does not automatically close every light gap. Combine correct rod length, top coverage, side returns and lining. A layered shade can handle residual light without requiring an oversized curtain stack.
Use How High to Hang Curtains for the top line and the Curtain Length Guide for the lower edge. Treat horizontal and vertical coverage as separate measurements.
Corners, molding, vents, switches and other obstacles
Measure the clear wall from the frame edge to every nearby obstacle. Include the finial, not just the bracket. A rod can technically fit while its finial blocks a cabinet door, overlaps crown molding or crowds an air vent.
When one side is restricted, use the maximum practical extension that preserves balance. A compact finial can recover useful wall space. A track with end caps can be more efficient than a decorative rod when the opening is close to a corner.
Move artwork only after the complete rod and open curtain stack are marked. Use the Wall Art Size Calculator to resize or reposition adjacent pieces so they do not compete with the widened window treatment.
Curtain rod length in rentals and temporary installations
Renters may need to reuse existing holes or install hardware with limited wall changes. Measure the current bracket centers and usable pole span before buying curtains. Existing rods are often only slightly wider than the frame and may not provide ideal stack-back.
A tension rod inside the frame does not use the same extension formula because it sits within the opening. It is useful for café curtains and lightweight privacy treatments, but it does not create the high-and-wide effect of an outside-mounted rod.
When the rod cannot be moved, calculate fullness from the actual installed span. Choose panels that look intentional on that rod rather than buying for a wider future position that is not available.
Ceiling height changes curtain length, not the horizontal rod formula
An eight-, nine- or ten-foot ceiling changes the mounting height and panel drop. It does not change the basic rod-length formula. Two rooms with identical window frames can use the same horizontal rod span even when their ceilings are different.
Use the ceiling-specific guides for 8-foot, 9-foot and 10-foot ceilings to select vertical panel lengths. Then use this curtain rod length guide for the horizontal frame and stack-back decision.
Keeping the measurements separate prevents a common ordering error: selecting the correct extra-long curtain length but buying a rod and panel set that are too narrow for the window.
Worked curtain rod length examples
Example one: A 48-inch bedroom frame with six inches per side needs a 60-inch usable rod. Two 2.5-inch finials create a 65-inch tip-to-tip width. At 2x fullness, the fabric target is 120 inches.
Example two: A 72-inch living-room frame with eight inches per side needs an 88-inch usable rod. Three-inch finials create a 94-inch total wall width. Four 52-inch panels provide 208 inches, which equals about 2.36x fullness.
Example three: A 96-inch sliding door with twelve inches of clear wall on the stack side and eight inches on the opposite side needs a 116-inch usable one-way span. Use a track or rod designed for the full width and load; do not force symmetrical extension when the architecture is asymmetrical.
| Frame width | Left extension | Right extension | Usable rod span | With 3-in finials |
|---|---|---|---|---|
| 36 in | 4 in | 4 in | 44 in | 50 in tip to tip |
| 48 in | 6 in | 6 in | 60 in | 66 in tip to tip |
| 60 in | 6 in | 6 in | 72 in | 78 in tip to tip |
| 72 in | 8 in | 8 in | 88 in | 94 in tip to tip |
| 96 in | 12 in | 8 in | 116 in | 122 in tip to tip |
Common curtain rod length mistakes
The first mistake is measuring only the glass. The second is treating the advertised adjustable rod range as though it were the exact usable span. The third is forgetting that finials add width beyond the pole.
Another mistake is choosing a long rod but buying too little fabric. Rod extension increases the coverage width, so panel fullness must be recalculated. Conversely, excessive extension with very bulky curtains can create an oversized stack and place unnecessary load on the rod.
Do not drill before marking the complete tip-to-tip line, bracket plates and open curtain stack. Check for wall studs, suitable anchors, wiring, vents, switches, cabinets and door swings.
- Measure outside frame edge to outside frame edge.
- Add left and right extensions separately when the wall is asymmetrical.
- Keep finial projection separate from the usable curtain span.
- Calculate fullness from the usable rod—not the window glass or finial tips.
- Confirm support and weight requirements for the selected rod range.
Final curtain rod buying and installation checklist
Record the frame width, left extension, right extension, usable rod span, finial projection, total tip-to-tip width, bracket centers, header type, curtain fullness, panel count, package quantity and expected open stack.
Compare the calculated span with the product’s adjustable range. Avoid buying a rod that reaches the target only at its absolute maximum when heavy curtains need greater rigidity. Confirm whether the stated product length includes decorative ends or only the telescoping pole.
Mark the complete treatment with painter’s tape and view it from the doorway, sofa and bed. Finish the vertical plan with How High to Hang Curtains and the Curtain Length Guide. Then place the full width, drop and panel data into the Curtain Size Calculator.
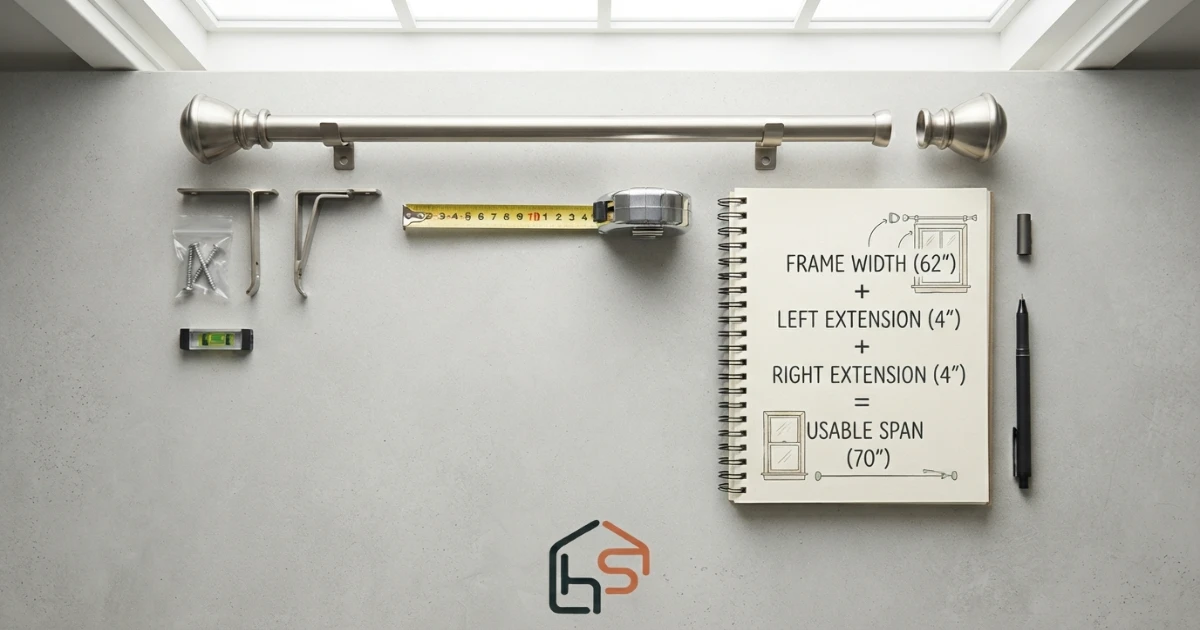
Two hardware types to compare after calculating the span
Search links are used because the correct size, finish and load depend on your measured span. Confirm the current product range, included brackets, finial dimensions and weight guidance.
Heavy-Duty Adjustable Curtain Rod
Compare rods whose adjustable range comfortably includes the calculated usable span rather than reaching it only at maximum extension.
- Check usable adjustable range
- Confirm center-support requirements
- Match rod diameter to header and weight
Wraparound Blackout Curtain Rod
Compare return-style rods when the goal is to reduce light gaps at both sides of the window rather than using decorative projecting finials.
- Check return depth to the wall
- Verify the working span and included brackets
- Confirm panel travel around the return
Affiliate disclosure: As an Amazon Associate, HomeStyle Calculator may earn from qualifying purchases. Product ranges, package contents, specifications, prices and availability can change. Review the current listing before ordering.
Curtain rod length and extension questions
How far should a curtain rod extend past the window?
A practical starting range is 4 to 8 inches beyond each side of the window frame. Six inches per side works for many standard windows. Use more extension when thick or wide panels need additional stack-back, provided the wall, brackets and finials have enough clear space.
Is curtain rod length measured including finials?
The working rod span is normally the usable pole length between the finial shoulders. The overall tip-to-tip dimension includes the finials. Product listings vary, so compare the manufacturer measurement diagram with both the usable rod span and the total wall width available.
How long should a curtain rod be for a 60-inch window?
With a 60-inch frame, a six-inch extension on each side produces a 72-inch usable rod span. Add the finial projection on both sides to estimate the total tip-to-tip wall space. A wider extension may be useful for heavy panels or a large glass area.
Should the curtain rod be wider than the window?
Yes. Extending the rod beyond both sides lets the open panels stack partly outside the glass, makes the window appear wider and reduces the chance that closed curtains leave side gaps. A rod that matches only the frame width usually covers too much glass when open.
How do I calculate the number of curtain panels?
Multiply the usable rod span by the selected fullness ratio, divide by the finished width of one panel and choose the closest practical panel count. For a center-opening treatment, use a balanced number of panels on both sides without creating extreme over-fullness.
Do blackout curtains need a longer rod?
They often benefit from more side extension and a wraparound or return-style rod because this reduces light gaps at the frame edges. Rod length alone does not guarantee blackout performance; overlap, returns, top coverage and the curtain lining also matter.
How far should a curtain rod extend for sliding doors?
Measure the complete door frame and add enough clear wall for the open panel stack to move away from the active glass and handle. Wide or one-way-draw treatments may need more than the standard residential window range. Mark the stack zone before buying the rod.
What should I do if there is not enough wall space beside the window?
Use the maximum symmetrical extension that fits without hitting a corner, cabinet, switch or adjoining wall. Then reduce the fabric bulk, use a compact track, choose a one-way draw or accept that some glass will remain covered when the curtains are open.
Turn the rod span into a complete curtain order
Calculate rod width, panel length, fullness and quantity before buying curtains or hardware.